 (May 2002)
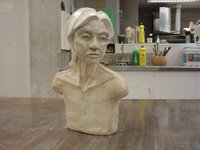
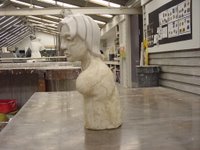
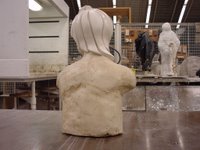
Here is the Head sculpture posted earlier after it's was cast. I started an explanation of the casting process to go with this post. When I reached 2000 or so words and wasn't nearly all the way through I decided to stop and save it for another day. I also don't have any pictures of the process. It's just to messy and time sensitive to operate a camera while working on it. I really need someone else to take pictures while I do the work.
The quick rundown of the process is: The clay can't be fired, it's not formulated for that, so you must make a mold off it. A plaster waste mold is made around the clay. The mold is opened and the clay is removed. This destroys the original sculpture, but now you have a negative of it.
 This sculpture was cast in a material called Densite. Densite is very much like plaster, it just cures harder and stronger. The mold is prepared for casting by coating the inside with Sunlight dish detergent. A cheap and effective mold release. Because Densite and plaster are similar materials they like to stick together. The mold release keeps them apart. The Densite is mixed up and poured into the mold. You have to wobble the mold around and tap on the sides to release any bubbles that may have formed while pouring the Densite. Then you let the mold sit while the Densite cures.
After it cures the cast sculpture can be removed from the mold. This is where the "waste" in waste mold comes in. The only way to get it out of the plaster mold is to break it out. So the plaster mold is chipped away from the sculpture. This is a fun step because it looks like you are carving a perfect sculpture out of stone.
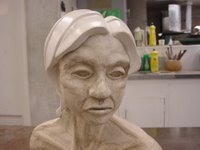
 Once released any finishing work can be performed on the sculpture. Densite is very white in it's natural form, but it also takes pigments well. When I looked at the piece I decided I wanted keep the hair the natural white colour. I also wanted to make it very smooth. To do this I sanded it. Then I sanded it some more. Then did some more sanding. And finally sanded it. This was done with progressively finer sand papers. I think I started with 100 grit dry paper and ended with 400 grit wet sanding. Finally a clear floor wax was used to seal the surface so it wouldn't pickup dirt.
 The face and body I wanted to tint a kind of skin tone. To do this I mixed several different pigments together with linseed oil and paint thinner. The linseed oil helps to seal the Densite, and the paint thinner makes it, well thinner, so it's absorbed better. By making the pigment very light many layers needed to be applied to get the colouring. This has the effect of bringing out the natural flow lines in the Densite.
Densite is porous, but this porosity veries through the surface of the casting. By layering on the linseed oil and pigments the more porous areas attract more pigment then the less porous areas. This can give a natural stone look to the sculpture.
So with the two parts of the sculpture sealed this piece was done. My first permanent sculpture. I'm very happy with it, and I'm glad I waited for this one to be my first to cast.
1 comment:
I haven't don't a sculpture for 26 years, I have forgotten what to do next. I need to make a mold so I can make several copies. Do I let the clay dry out prior to making the mold of it or do I wait till it is fired?
Thanks for your response
Ramona Wood
mamasbiggirl@hotmail.com
Post a Comment