Saturday, November 25, 2006

Element: 3 Years of Fill-ups

I've now had the Element almost 3 years so I decided to it was time to analyze all the fill-up data I've collected over the years. Every time I get gas I fill the tank, then I record the date, odometer, volume of gas, and amount spent.

So I just took all this information and plug it into a trusty spread sheet and generated some cool graphs and some useless one.

The overall data:
Total Spent on Gas: $2774.37
Total Litres purchased: 3332.845L
Average price of Gas: 83.24 Cents/L
Average Fuel Economy: 10.45 L/100km
Average Fuel Economy: 22.50 Miles/Gallon

Now for some pretty graphs. The first one is the odometer reading over time. Obviously this one will always go up. What's interesting is that the amount of driving I do is fairly constant as shown by the slope of the graph, except for 2 humps. These hump just happen to be the times I drove to Brickfest in Washington D.C.

The next graph is fuel economy. This one varies a lot. This is mostly do to driving habits. After some fill-up I'll do lots of highway driving, and after others it will be more city. But I do find it interesting that there appears to be an annual cycle forming. Overall fuel economy appears to be better through the summer and into the fall, the through the winter and spring.


This graph is the price of gas over time. It has nothing to do with my vehicle other then you can see how bad the price of gas was at the end of last summer.


No we get into some silly graphs, like how much gas I put in per fill up. Hmm, just over 2oo km is the minimum, I wonder why that is. I seem to do a lot of driving to somewhere 200km away, fill-up, then turn around and come back.


Finally another mostly useless graph. This one shows the average number of kilometres I travel per day for each fill up. The two large spikes are the trips to Brickfest. The next size spikes are most likely quick turnaround trips to that place 200km away.

Sunday, November 19, 2006

Sculpture: Guay Head

(November 2006)
My previous post about Guay was a lead in to this one. Ever since I met Guay I've always wanted to sculpt her head.

When she first came to the class to model she had this wonderful chaotic hair style. The only thing I can think of close to it is Andy Warhol's hair. Short and sticking out all over. It looked awesome. But I was casting at the other end of the class, so I could only think about how cool it would be to sculpt her.

Then the next time she was in she was completely bald. Which was great because it was the first time I could actually see the structure of the scull on a models head. My previous two head sculptures do have some problems with proportion on the back of the head.

Unfortunately the second time she was in I was also working on casting.

Finally this year I get my chance. She had a small tuft of hair above her forehead so she's effectively bald. Ideal for me, but she was the first model of the term, and the teacher likes to do several quick, half class poses for the first two classes, then one full class pose. Three classes being the longest we get with a single model. Not ideal.

I wanted to do this piece so badly though. I haven't work so hard and so fast on something like this in a long time. It was great. I had one three hour class to get as much done as I possibly could. And I was absolutely amazed at how far I got.

The pictures here are of the piece just before I started casting. I did three weeks of clean up work in class, and I actually brought this one home and worked on it for another 5 hours.

But what I got done in the one class was enough to base all the rest of the work on. Which was great. It showed that I'm getting to a point where I can worked quickly from the model and get enough down to be able to finish it from memory.

But, but you say, the sculpture has hair, and you said she was bald. Yes well, I like to do hair. One of the funnest things is coming up with a hair style.

Although I like this hair very much, it wasn't my first choice. I had a style in mind that was reminiscent of the hair style Guay had the first time I saw her. Unfortunately it was going to be too time consuming to produce. This year I am only able to make the fall session of classes. This means I must get to at least the completed mold stage, or the piece is lost.

Last week I started molding. There are two weeks left. It shouldn't be a problem getting the mold done now. There is some question as to whether I can get the clay out. But that's not a serious problem. It just means it will be very heavy to take home, and I'm going to have quite a mess in my bath.


When will I get it cast? Probably fall 2007. When will it be finished? Probably spring 2008.

Wednesday, November 15, 2006

Sculpture: Guay Seated

(October 2006)
All the models that have posed on the Sculpture class I take are awesome. It's hard work holding the same position for 3 hours and then return a week later and take the exact same pose for another 3 hours.

If all the models are the best, Guay is the best of the best. She is also in high demand so we rarely get here. In fact this is the first time I actually go to sculpt from her. The previous few times she was in I was stuck down at the other end making a mold.

Not only is she curved to fit a beautiful sculpture æsthetic she takes poses that are hard to hold. Usually involving twisting or arching the torso.

In the first two classes of a session we tend to do quick sketches rather then multi week posses. This is a sculpture that I did of Guay in an hour and a half. I'm very please with how much I managed to get done in that short amount of time.

Wednesday, November 01, 2006

Wednesday, July 19, 2006

Sculpture: Torso, Part 2

(September 2005)
So after a clay sculpture is completed it must have a mold cast from it in order to make it in some way permanent. Unlike the Tile where it was made from a firing clay, most of the sculpture work I do is done in clay that is much like what you dig out of the ground. In the sculpture case it comes from a special mine in Kentucky, I think. But that just because it's a consistent quality.

Making the mold, then casting it is a involved process, and not a very artistic process. I'm going to try not to get into too much detail. In the end it's not all that exciting.

In this case the sculpture allowed for a one piece mold. This is the simplest case, and as the name suggest the mold only has one piece. The more complicated the shape, the more pieces you need for the mold.

The mold is made from simple plaster. It is layered on for strength, and finally a layer of burlap is applied to hold it all together. Once the mold is completed the final material is poured inside the mold and allowed to harden. In this case the mold is a waste mold, because the mold is destroyed in order to remove the sculpture from it.

In the picture above the piece has already been cast. Because this mold is so big it would be impossibly heavy to cast it solid. So instead I cast it as a shell. This sculpture is case in Densite, which is a plaster like material but it cures harder. To cast the shell I poured some Densite into the mold, then tipped the mold and allowed the densite to cover all the surfaces. I did this repeatedly until the entire inner surface of the mold was covered to a thickness between .5 and 1 cm thick. Over that I placed a layer of Fiberglas soaked in Densite, and for good measure I added a grid work of wire to hold everything together.

Getting the piece out of the mold is a matter of breaking the mold off the piece. This is done with a wooden hammer and chisel. In this case I was at the cottage and didn't have a wooden hammer, so instead I used a log. The wooden hammer is desirable over metal or rubber because of its rebound properties. It gives a much better feel for what is happening at the chisel blade. Metal hammers give to sharp a strike and rubber is too bouncy.

This mold came off quite easily. Because the sculpture was so smooth in many places large chunks of the mold just fall away after being struck.

This is also a very satisfying part of the process because you get to see the sculpture again for the first time in a long time. In this case about 6 months.

Finishing this piece involves sanding off the mold sheen and other imperfections. I didn't get to that till this summer.

Wednesday, June 28, 2006

Sculpture: Torso

(March 2005)
This is the big project. Over the years of taking this coarse there have been several people who have consistently been there. One of them, Gill, always works big. Very big. To heavy to lift big. For a sense of scale his sculptures are topically life size in proportion. By comparison I topically work in a range of 1 to 1.5 feet in length for a full body. This means Gill rarely does the full pose. He usually concentrates on the torso.

I've always admired his work, and decided early in the year I wanted to try doing a pose really big. In the Winter session an opportunity presented itself with a perfect reclining pose. So I grabbed the biggest board I could, a large chunk of Styrofoam to help keep the weight down, a pile of clay, and lots of encouragement from the teacher and tech, and went big.


This sculpture is big, like Gills work. Unlike Gill I tend to be more realistic where he tends to abstract his works. The sculpture is about 80-90 percent life size to the model.

These pictures of the piece are after 3 classes with the model and 1 class of cleaning up. If you look at them in detail you will see the clay is covered in tool marks. This is from me working the surfaces to get the forms just right.

Ultimately I wanted the surfaces to be very smooth. The process of doing this takes a lot of time. It involves working the surface with a fine toothed saw blade and a sponge. Gradually working out all the tool marks and smoothing out the surface. This took another 2 or 3 classes.


These pictures are of the sculpture at the start of the last class I worked on the sculpture. It is fresh out the garbage bags we use to keep the clay from drying out between classes. The next week I started casting it. Almost all of that last class I spent working on the nipples. If you look closely here the nipples are surrounded by a swirl of tool marks. While this look often works, it doesn't work with when the rest of the sculpture is so realistic.

So that class I spent consulting with the teacher and the model that was posing in a different pose at that point, trying to figure out how to make the nipples look more realistic. I settled on a process of adding tiny bumps around the nipple and blending them in. This was a long and slow process but it yielded much better results then what is pictured above.

The other major difference is the rib cage and the clavicle bones have been toned down. The day school teacher dropped in one day, and I know him well from when he used to teach night school, and made a couple of simple comments. He is like that. You don't get praise from him. You do get excellent pointed criticism. Which is exactly the kind of thing you need when learning. He simply pointed out how harsh the lines of the ribs and clavicle were compared to the softness of the rest of the piece. He then left it to me to do what, if anything, I wanted to address it. This is the kind of thing you need when working on something of this nature. You're so close to it it's hard to see it as a whole. Once he mentioned it, I could see exactly what he was saying. So I took steps to soften these lines, and I think it helped a lot.

The next step in this piece is casting it. Unusually I have pictures of some of that process. However I will wait for another post to continue the description.

Friday, June 09, 2006

Sculpture: High Fired

(March 2006)
Back to a sculpture from this year. I've posted this one earlier in it's clay form and bisque fired form. Now here it is after it's been high fired.


High firing is as the name suggest done at a much higher temperature. A special kiln is used for high firing. One of the things that happens in high firing is metals within the kiln will vaporize and condense on the pieces. Particularly iron oxides. This gives the pieces a warm glow after the firing. The clay also takes on more of a stone look then the very white crisp look after bisque firing. In this case I washed the piece in an oxide called rutile. This enhanced the natural oxide effect of high firing.

One other thing that occurred during high firing is two cracks formed. This was no surprising, I could see them forming in the bisque fired stage. They also correspond to places where I tried to join to blobs of clay after the clay had dried a little to much to be worked.

The cracks aren't serious, and don't pose a risk of propagating across the piece. They will make it a little weaker if dropped, but I'm not planning to do that intensionally.

Here are the four stages, clay, bisque fired, rutile applied and high fired.

Thursday, May 11, 2006

Sculpture: Dancer

s(December 2004)
It's been a while since I posted a sculpture.

This sculpture was started because I was board of sculpting guys. Through a unfortunate sequence of timing whenever I was in a position to sculpt from the model, the model was a guy, and I was getting tired of it. So I thought I'd try something different.

Around the sculpture studio there are a lot of pieces done by the day students. A lot of them are very good. And they get to do things that we don't get to do in the evening class. One of those things is carving. And I thought I'd like to give it a try.

To make things easier, then say carving stone, they make a box out of a special mix of materials. This makes for something that is easy to carve, but has the appearance of stone when finished. To make the blocks, they use a 2 liter juice container as a mold, mix together plaster, Densite and vermiculite. Vermiculite is a very soft stone material. The form they use for making the carving block is a lot like very small packing peanuts. It's also very light. The Densite and plaster are used to hold it all together. Densite is very similar to plaster it just cures harder. By mixing the three, about 2-1-1, you get about the right hardness for carving.

So after making two of these blocks, I needed something to carve. While it could be the model, the teacher didn't want to make a big deal out of me doing something different, so he suggested I make a maquette, to work from. Since I was doing Salsa dancing at that time, I decided to do a little dancer in the final position of a spin. I also decided to do a Japanese super deformed kind of look. Big head small body, simple forms.

The maquette above is quite small. The lead bars are to hold t up because it wasn't very stable, and it wasn't very well built. I think I slapped it together in less then an hour.

The next step was to start carving the block. This was a very interesting process. Very hard to get started. It's a tricky feeling, you know if you go too far you can't go back. But if you don't cut into the box, you'll never get anything out of it.

The block was interesting to cut. I use an old steak knife for most of my sculpting. It's a simple tool that works very well for me. This knife cut nicely into the box, so at at least that part of it was comfortable.

It's also tricky visualizing where things are within the box so you know where to cut. One of the suggestions the teacher had was draw each side of the sculpture on the sides of the box. Work your way around the block gradually cutting this pattern deeper and deeper. Another method is to cut to the deepest points, then work your way back out from those points. A combination of the two is probably the best.

Unfortunately something shiny must have crossed my path, because I never finished the carving. I do still have it, and I might finish it one day.

However I did go back to the maquette. Seeing as I didn't finish the carving I decided to cast the maquette so I'd at least have a reference if I went back to the casting.

So I spent a class cleaning up the maquette, and a few classes making the mold. I then prepared and cast it in Densite. This took me to the spring of 2005. The class work on this peice spanned the gaps in working on another piece.

Over the summer I worked on sanding it. I spent a week at a cottage with a bunch of friends from work. I spent a good amount of my time there working on this sculpture and another one. Finally when classes started up again in the fall I took the sculpture back to class and added colour to it. So from start to finish it took about a year to complete.


I am very happy with this piece. But it has a lot of mix emotions for me. It was originally intended to be a gift for someone that is no longer part of my life. When I said above that I stopped the carving because something shiny crossed my path, that wasn't the truth. I will always cherish this peace as a reminder of the good times we had together. I may never finish the carving. It's unfinished form is rather symbolic too.

Monday, April 24, 2006

Condo: The Move is Complete

I want to give a big thanks to Calum, John, and Jeremy for helping me move on Saturday. I couldn't have done it without your help.

I'd also like to thank Ken and Colleen for there help earlier in the week.

And I'd especially like to thank my parents for all the help and support they've given me from the day I expressed interest in the new place to helping me clean out old dump, they've been there.

So lets review the weekend.

I had reached the point of total exhaustion. I've been moving stuff over almost every day for the last two week. By the time Saturday rolled around I just couldn't deal with it any more. I couldn't think what went where or how to pack it or even how to carry it. Fortunately everyone did a great job of just picking up stuff and getting it over to the new place. All I did was babel a few incoherent thoughts and it all happened around me.

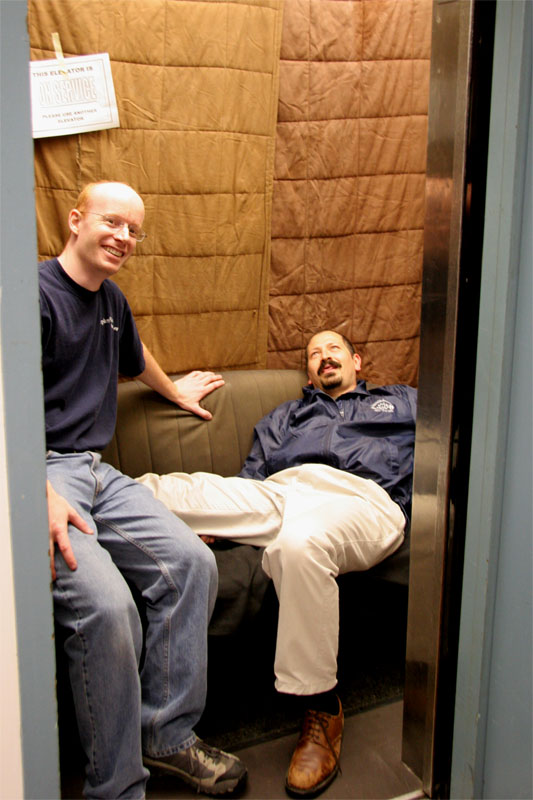
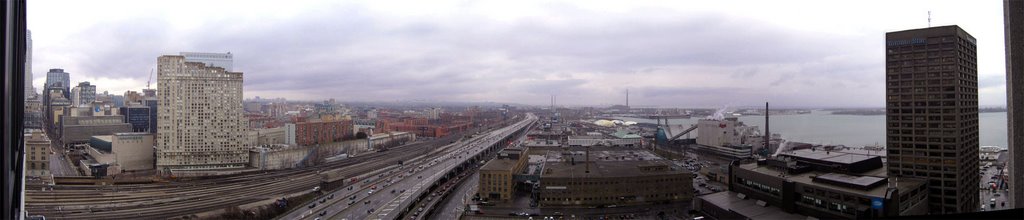
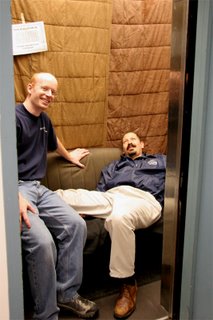
We did have a little fun too. Here's John and I ridding the couch down the elevator.


If you'd like to see the sequence of the Great Couch Toss it can be found on Calum's Blog. That was a very cathartic experience. That couch, was passed it's prime years ago. The black had faded to gray on the arms and the seat fabric was gone completely.

The cool thing is it only weighed about 35lb so it wasn't hard to lift into the bin. It's too bad I couldn't do the CityTV Christmas Tree Toss thing, 6 floor window and pyrotechnics, but heaving it over the side of the bin was quite satisfying none the less.

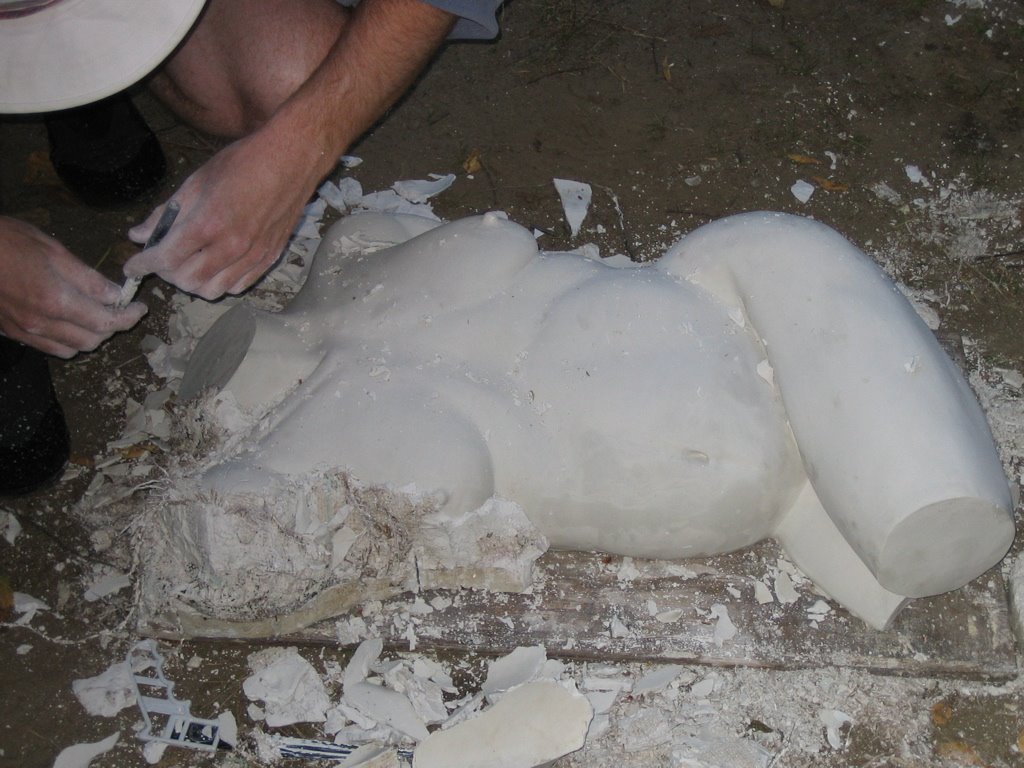
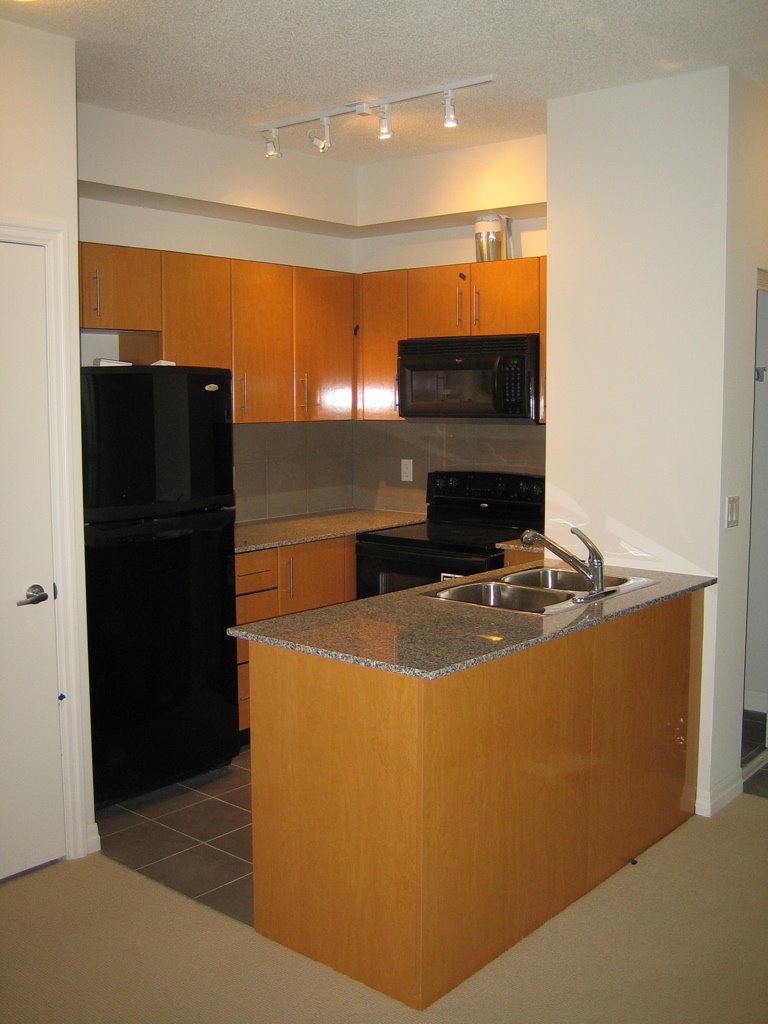
Another thing that was happening is people were joking about what strange things they'd find in the kitchen. It's the one area I hadn't managed to do much packing. I left my Mom to pack things up, but I know Jeremy and Calum helped out at times.

There where the typical things like, 15 year old bags of sugar, Jello in classic packaging, cans of questionably aged soup. And there were a few odd things too. Like a picture a framed picture of Wendy Messly that my friend Aair had given me years ago.

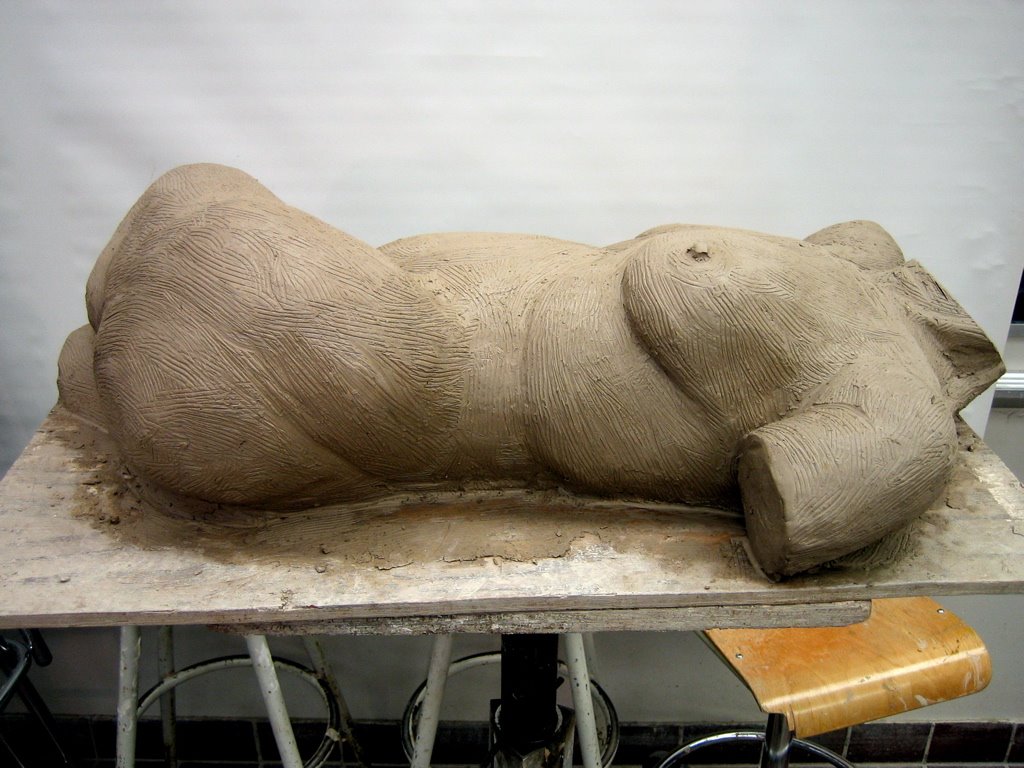
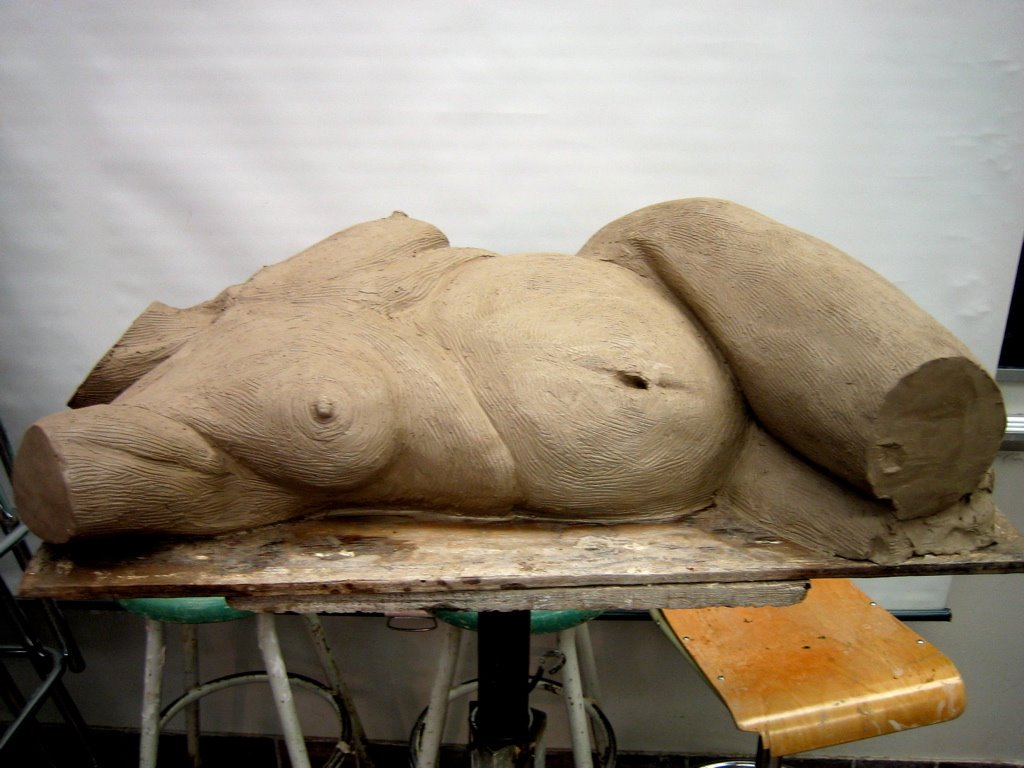
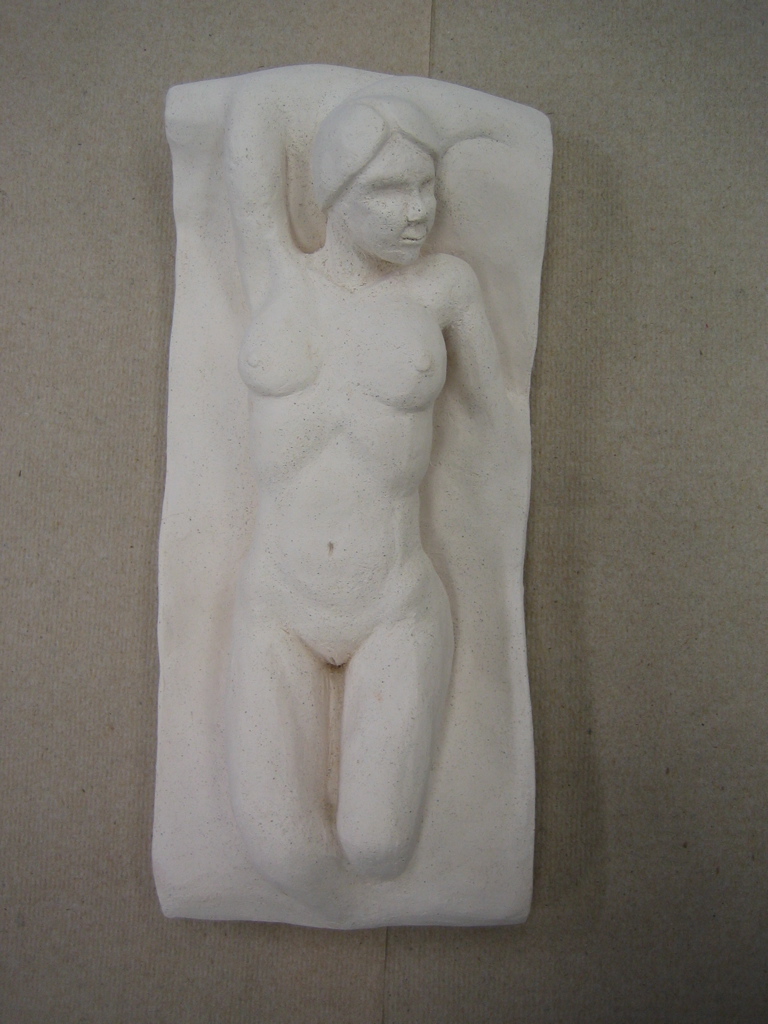
But the one really odd thing, which I had forgotten about was in a black garbage bag sitting above the cupboards. On the outside was a small label that had my name and "tues eve" written on it. In side was a board and two clay breasts sitting on it.

Even with context they're pretty odd.

But no-one Mentioned it specifically. I've got to assume John didn't see them because it's not like him to let a breasts go unmentioned.

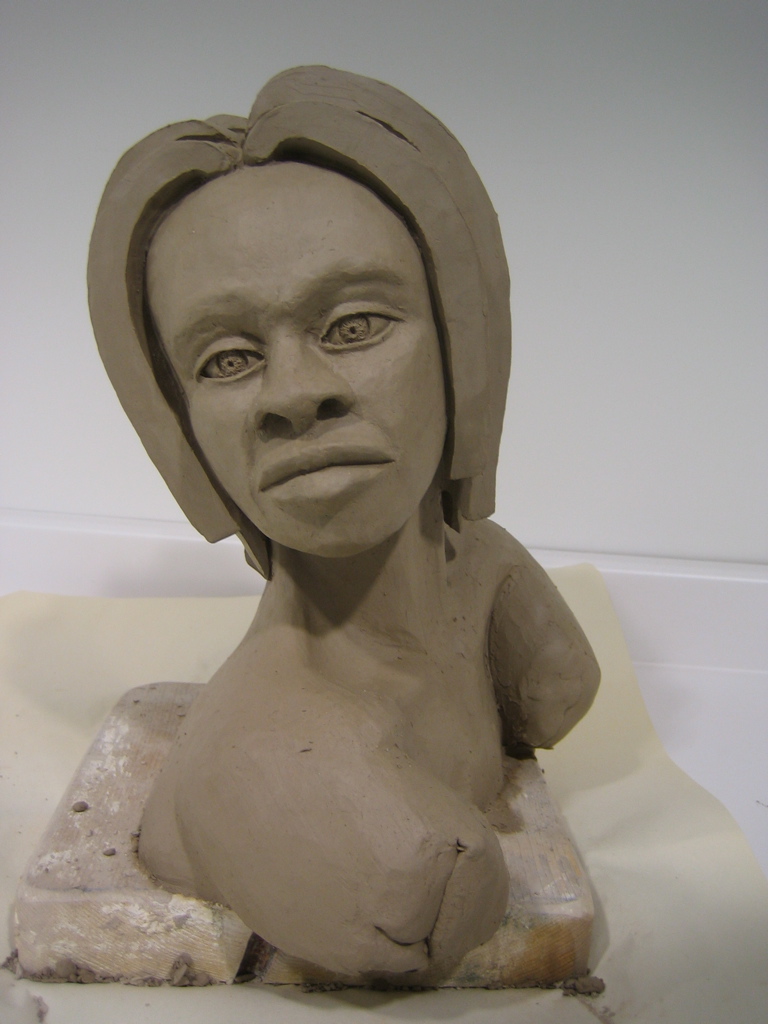
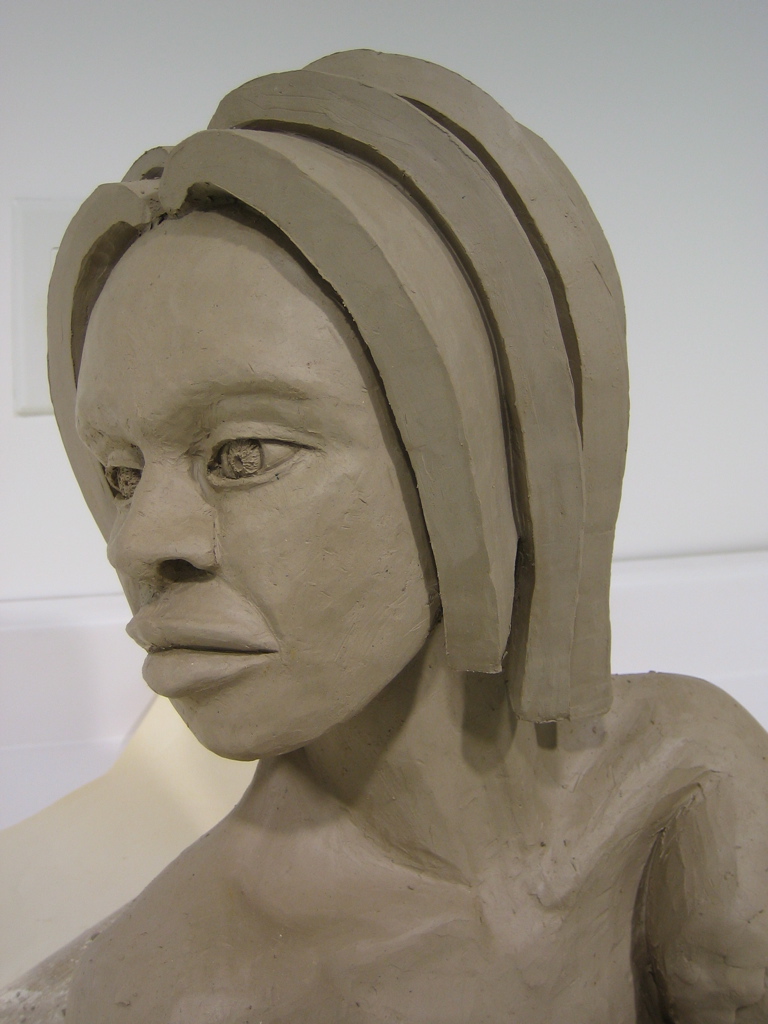
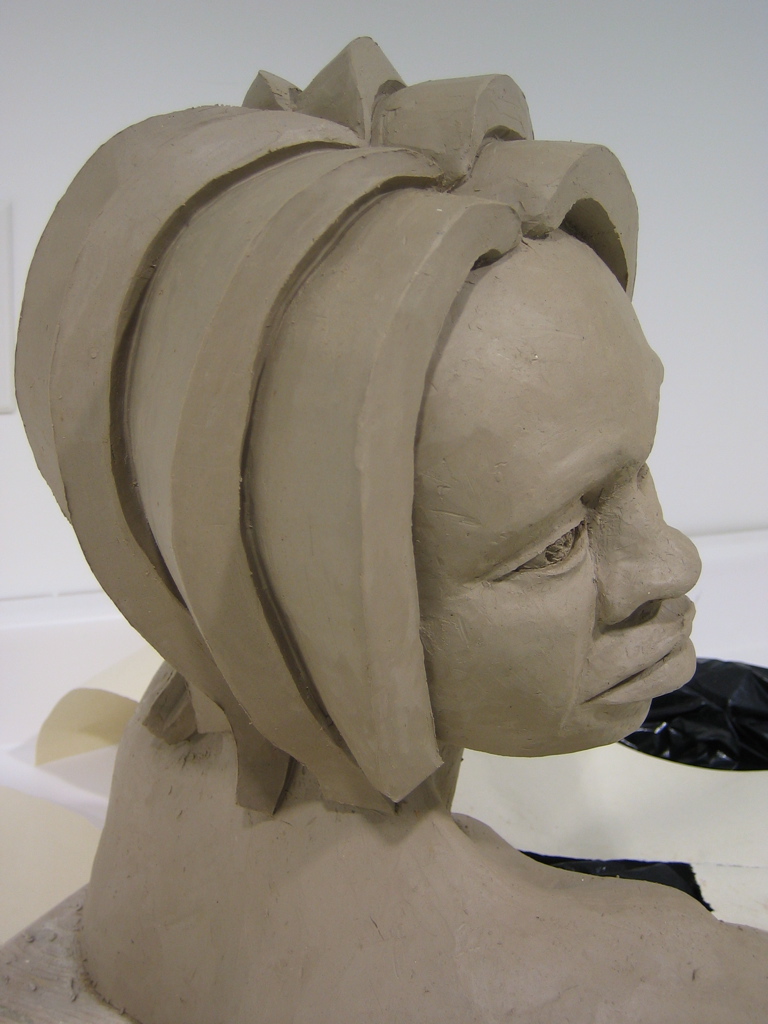
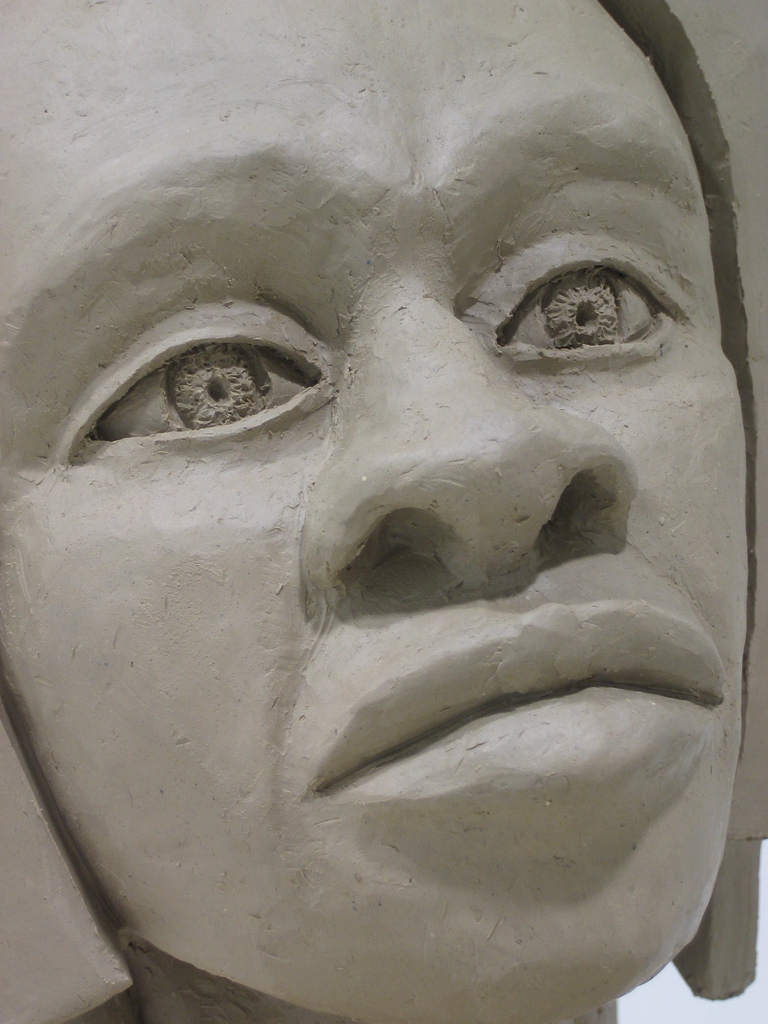
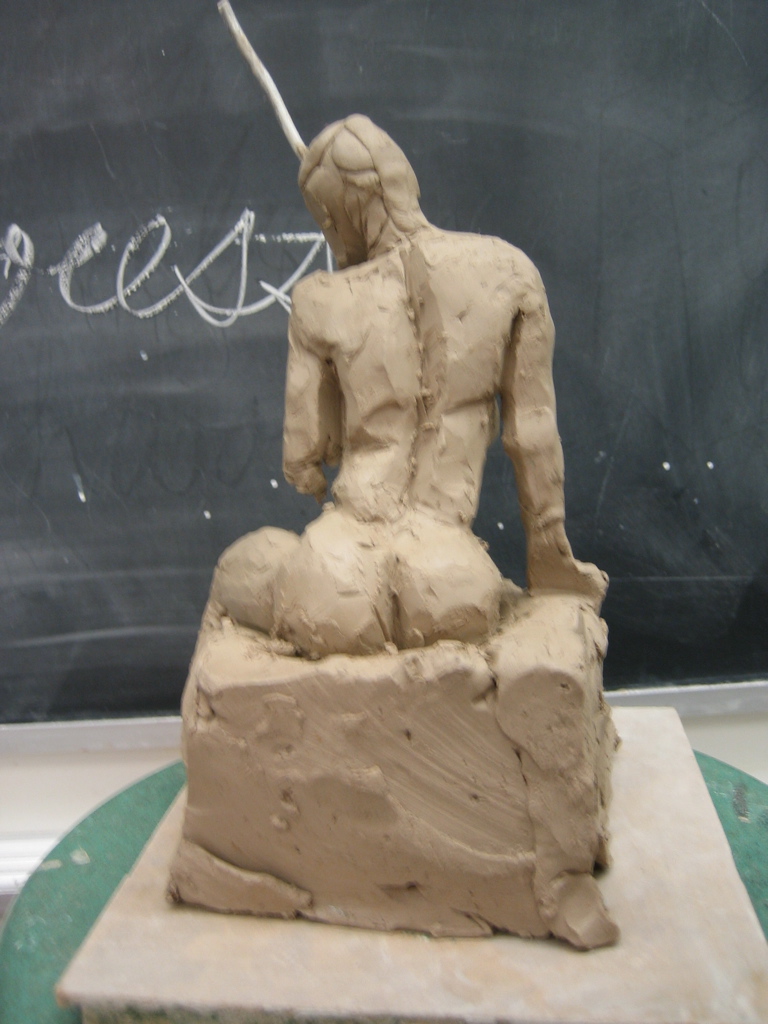
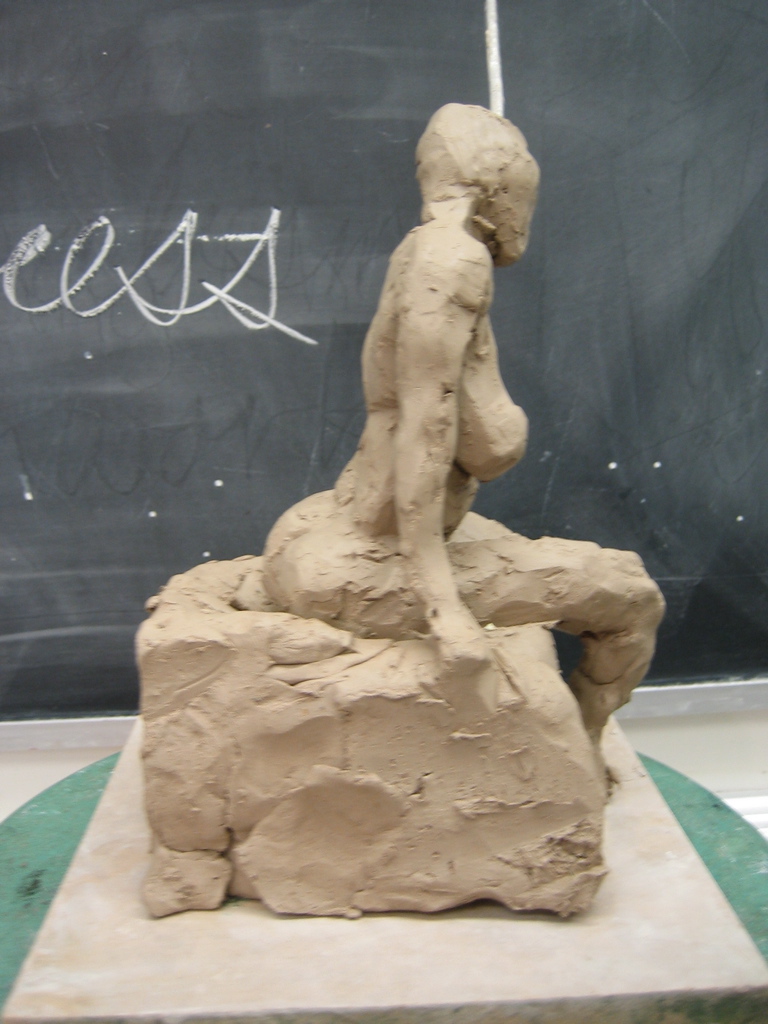
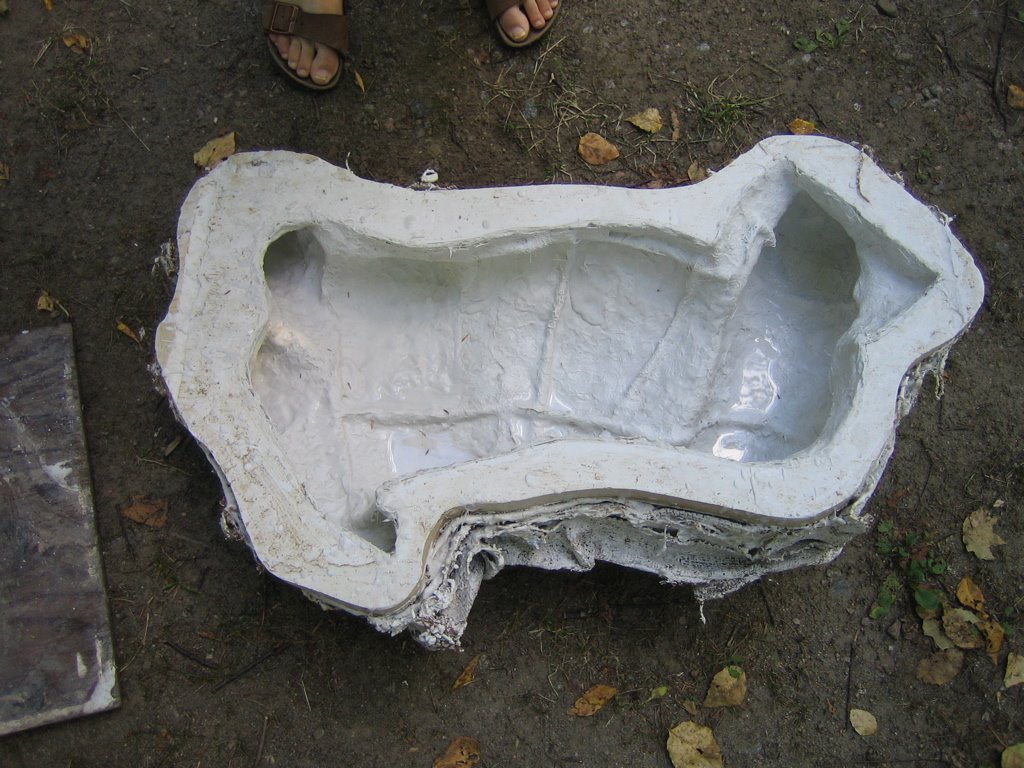
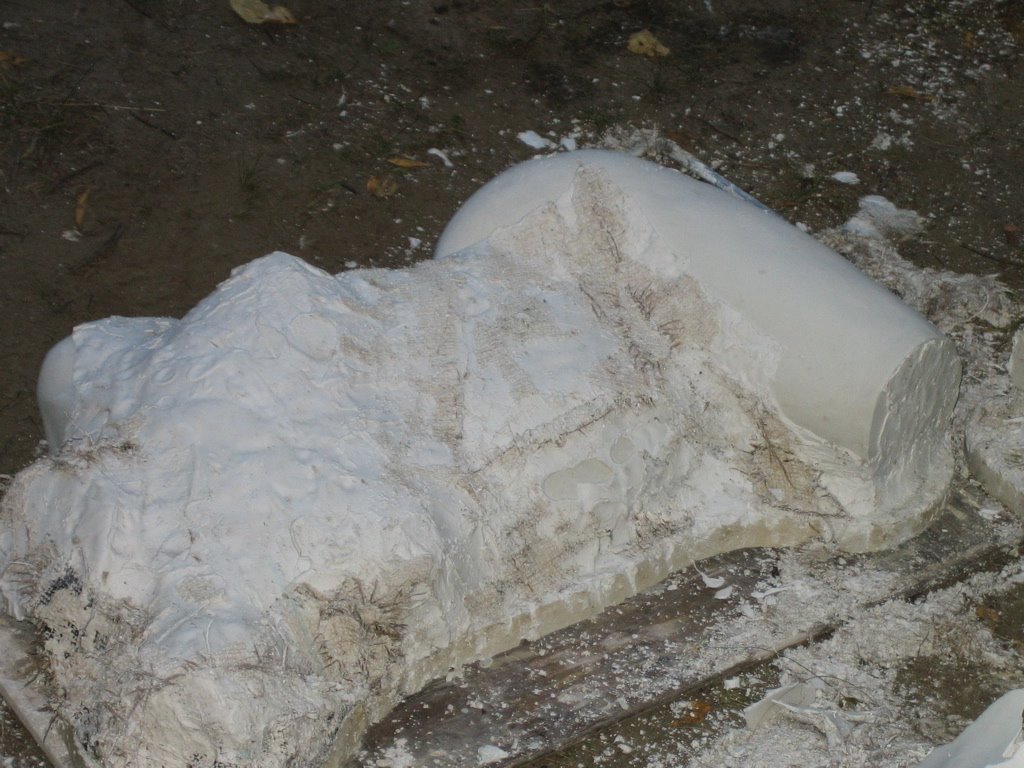
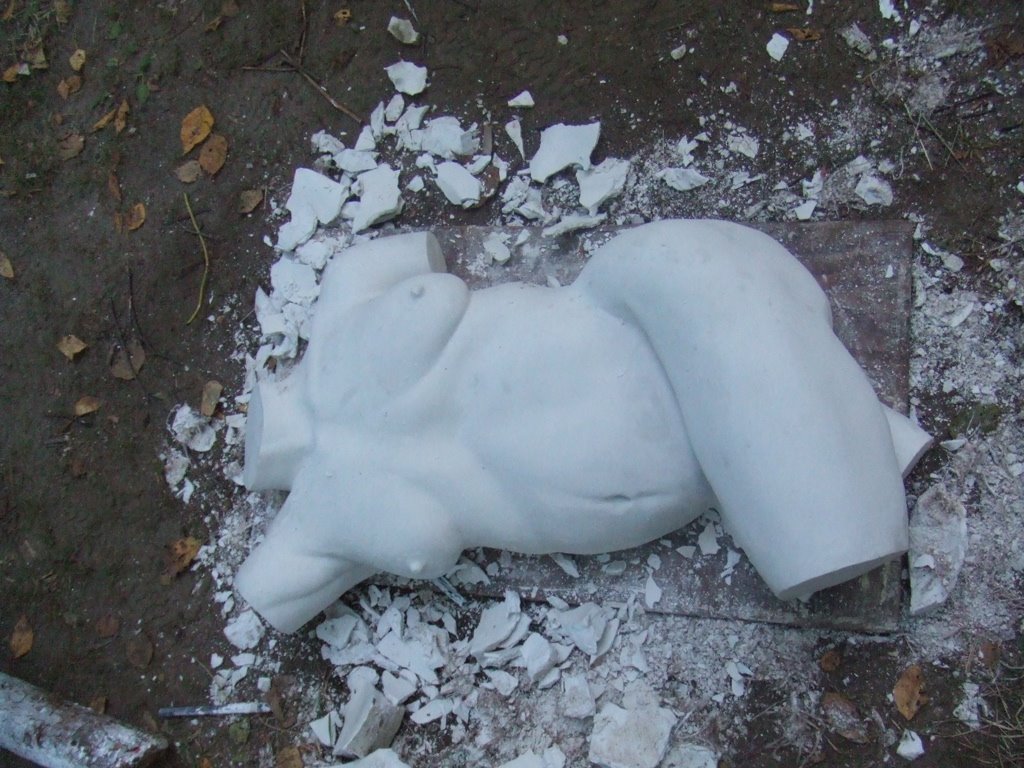
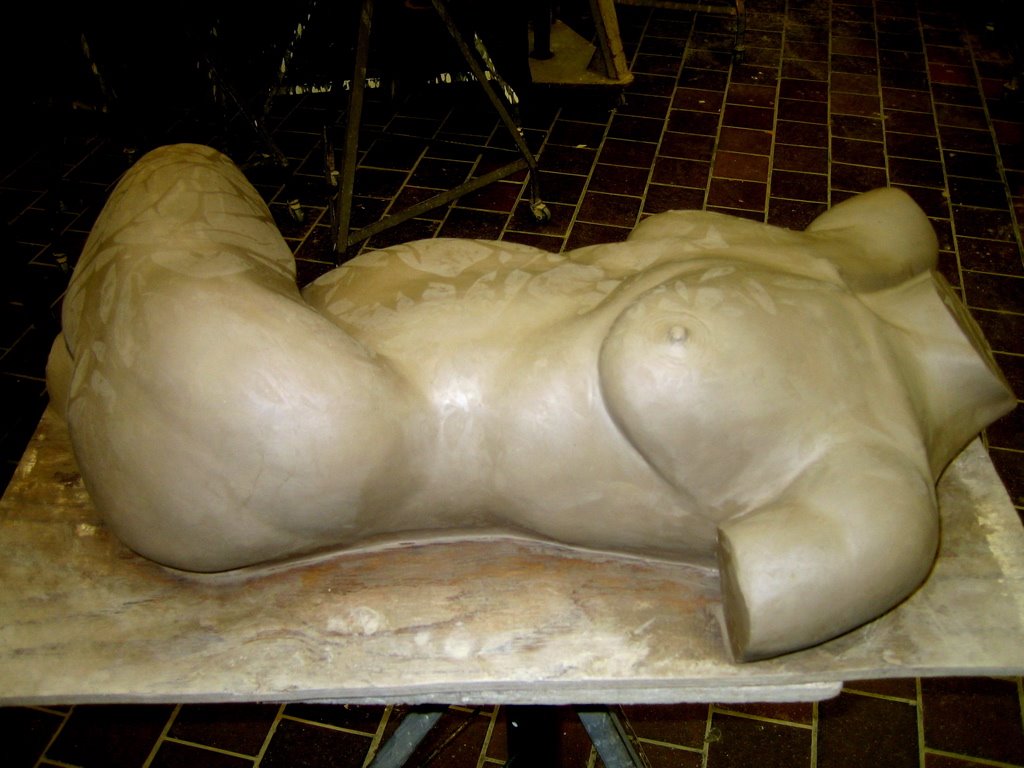
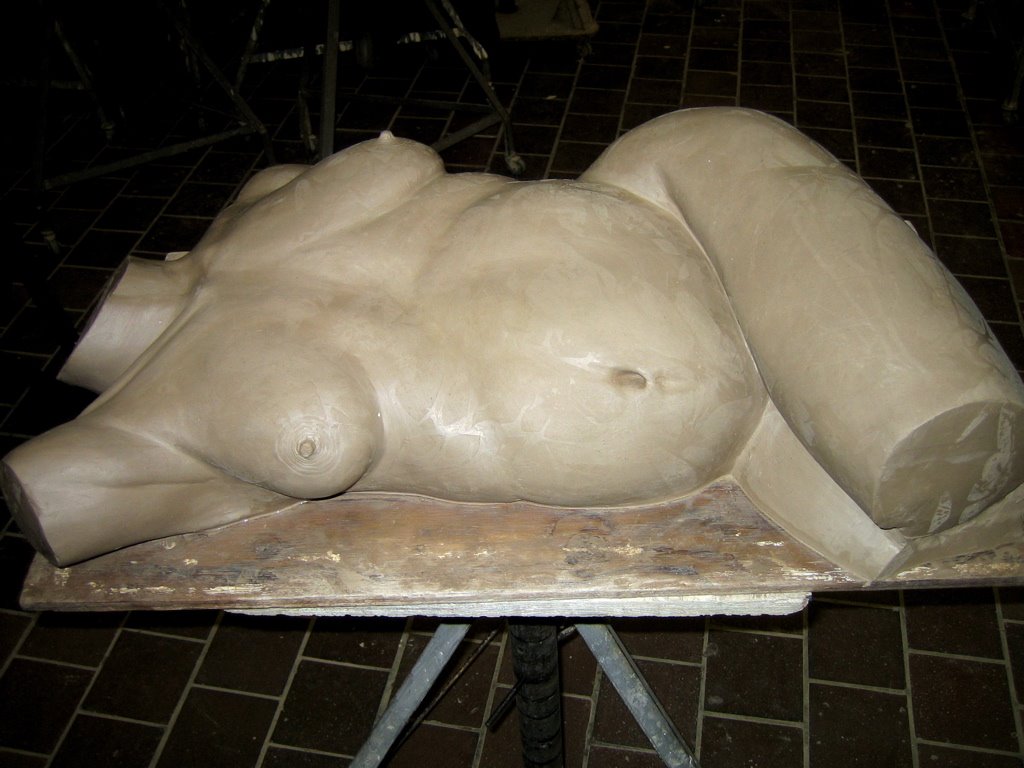
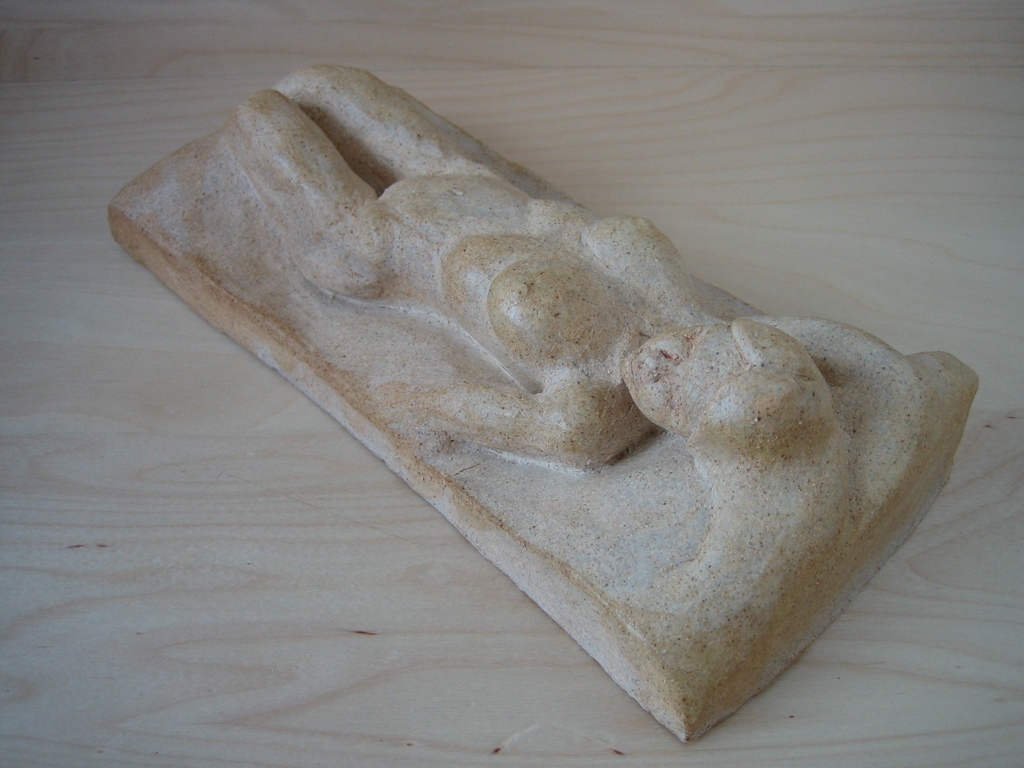
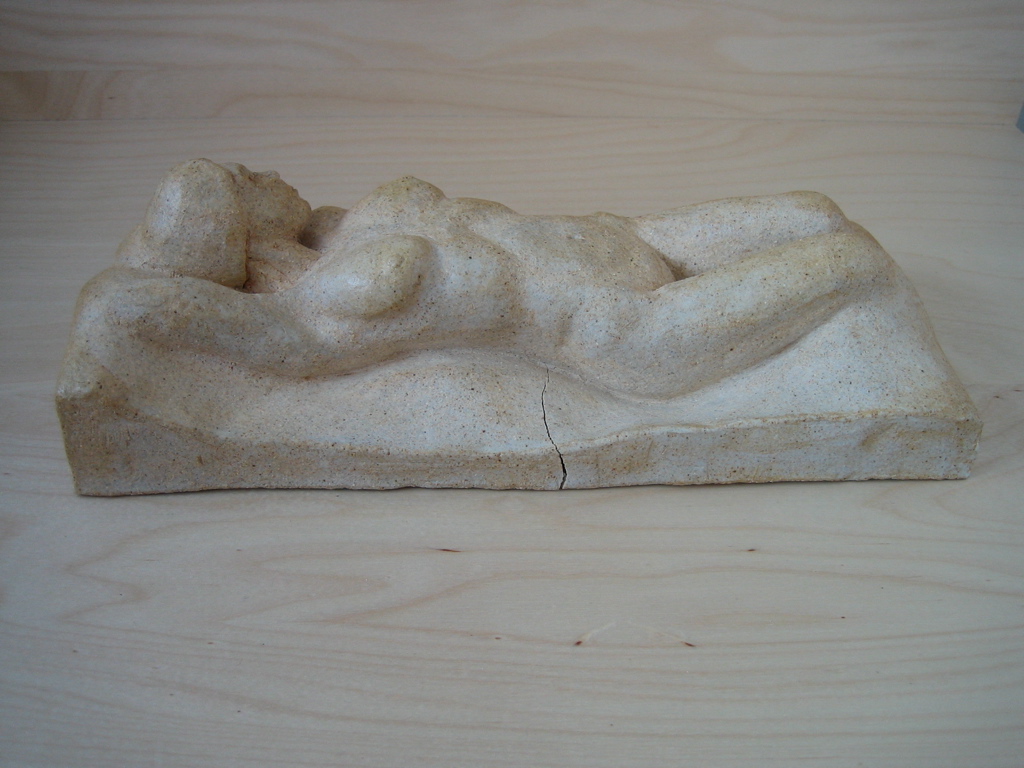
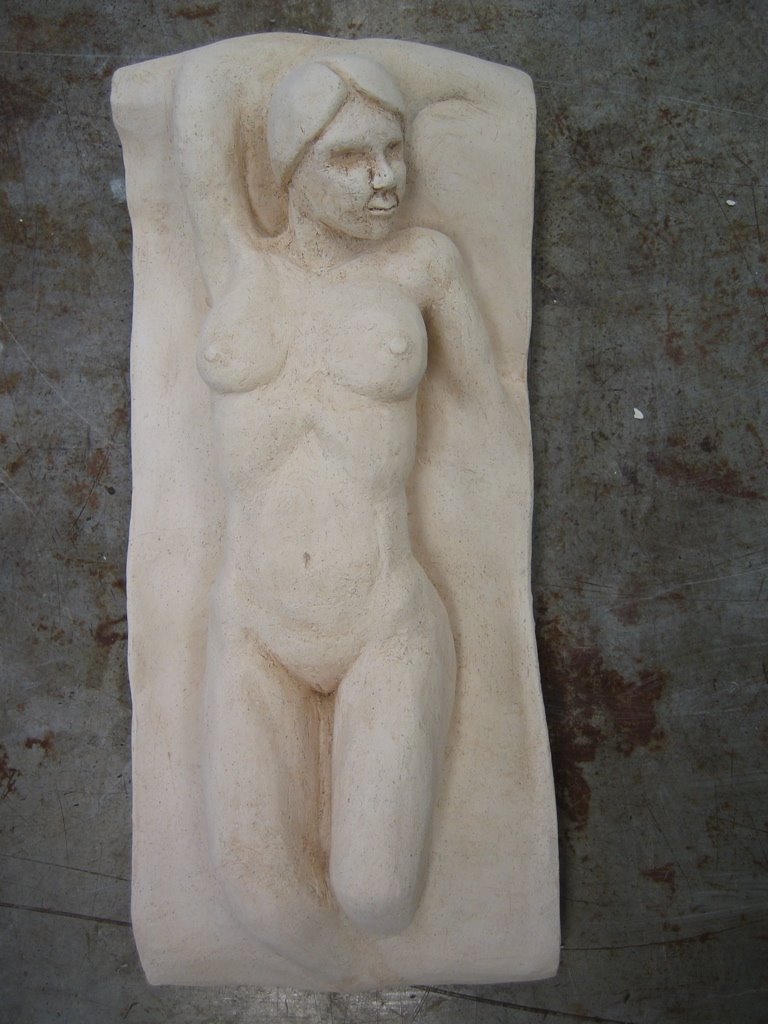
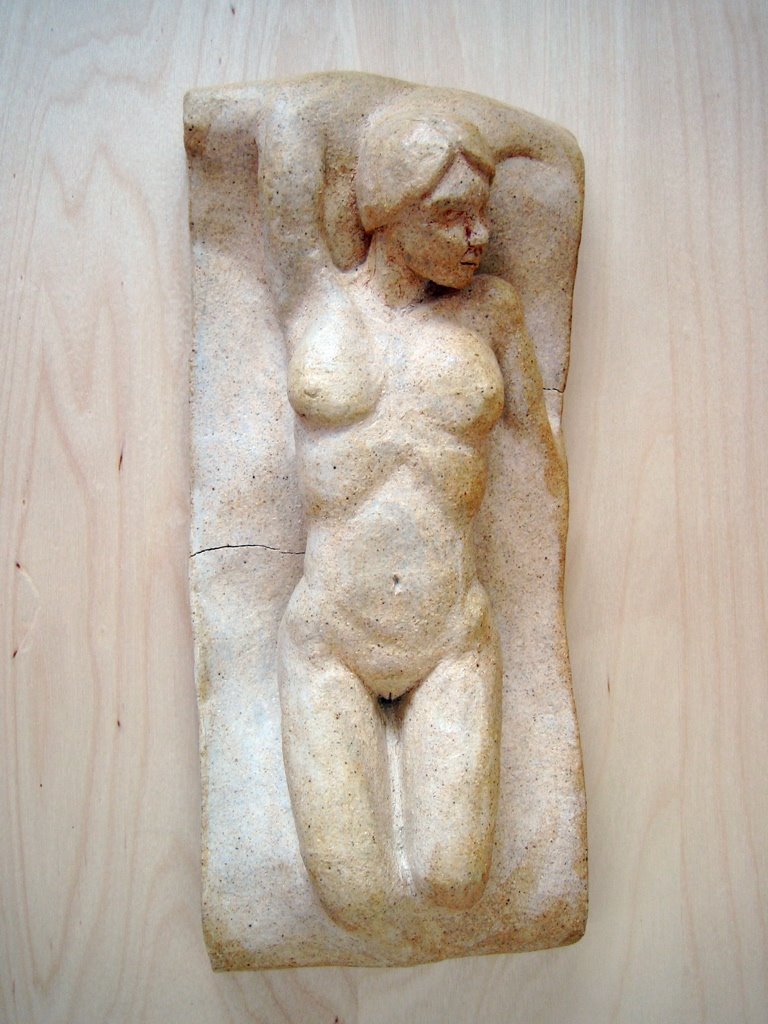
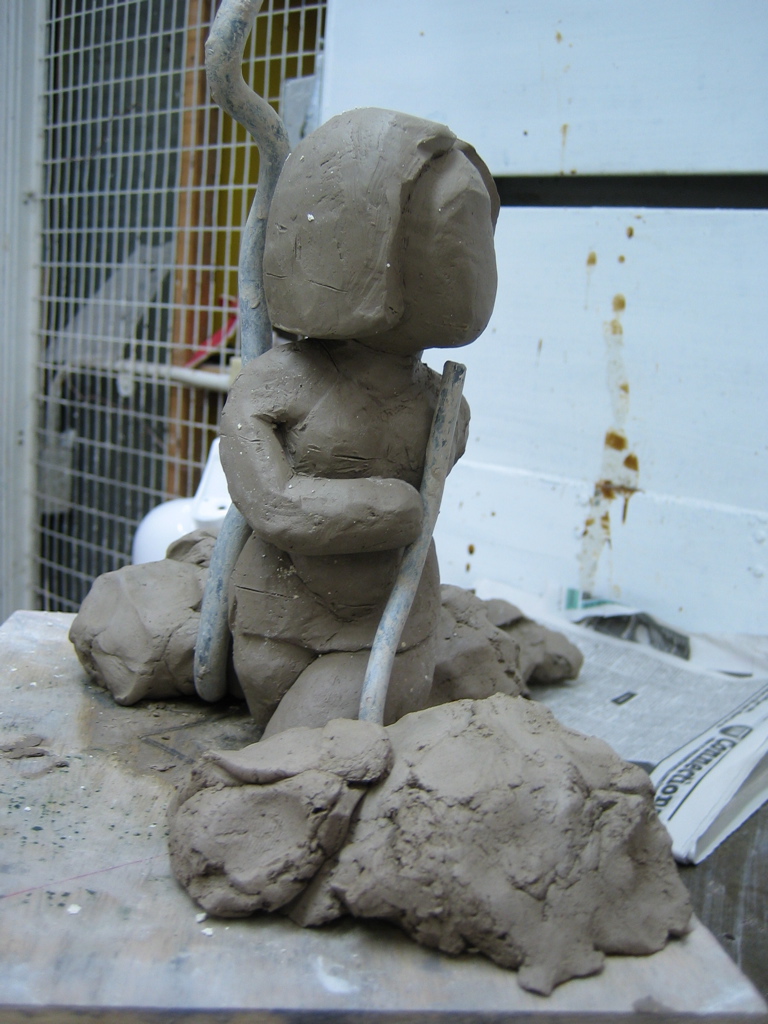
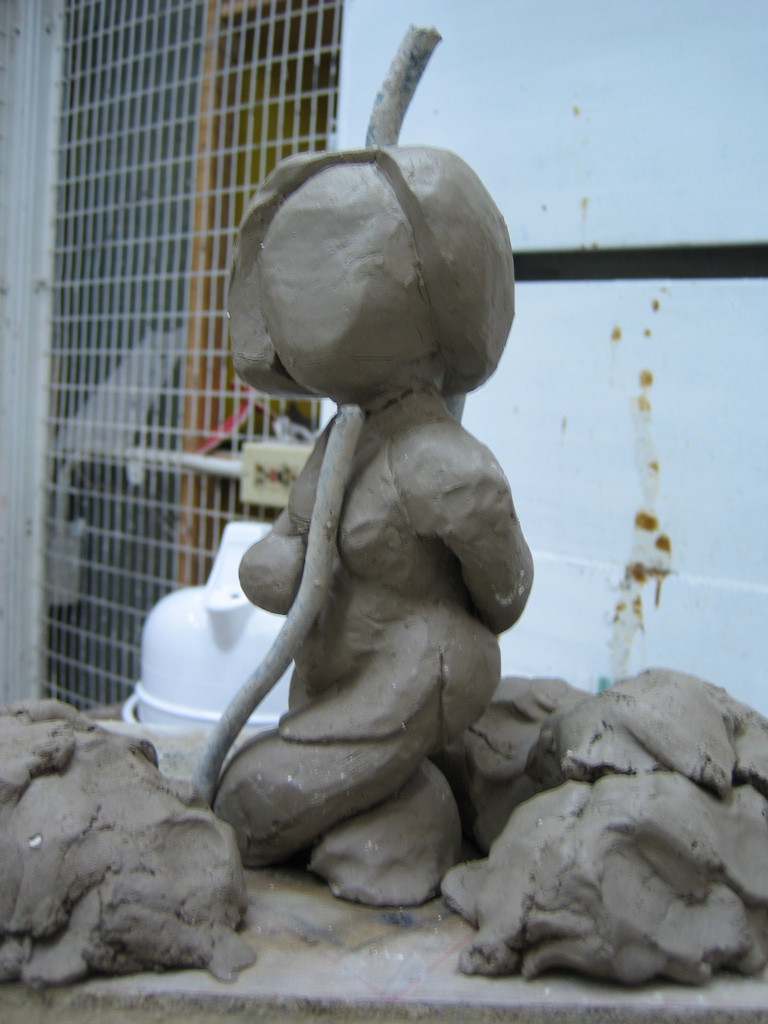
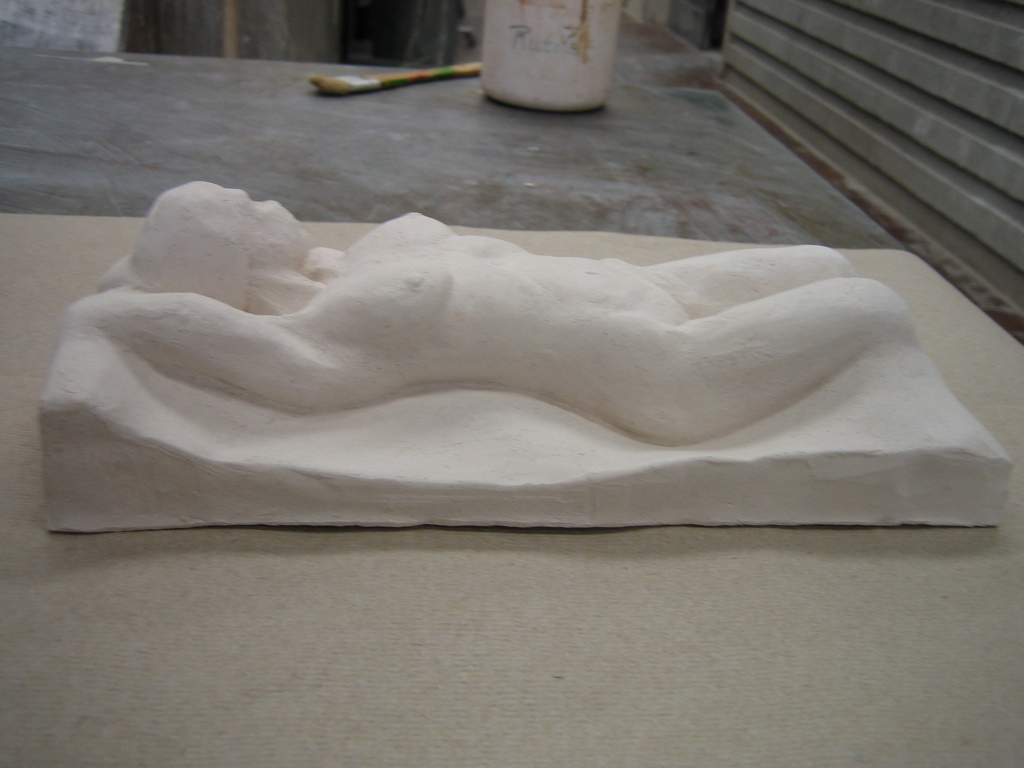
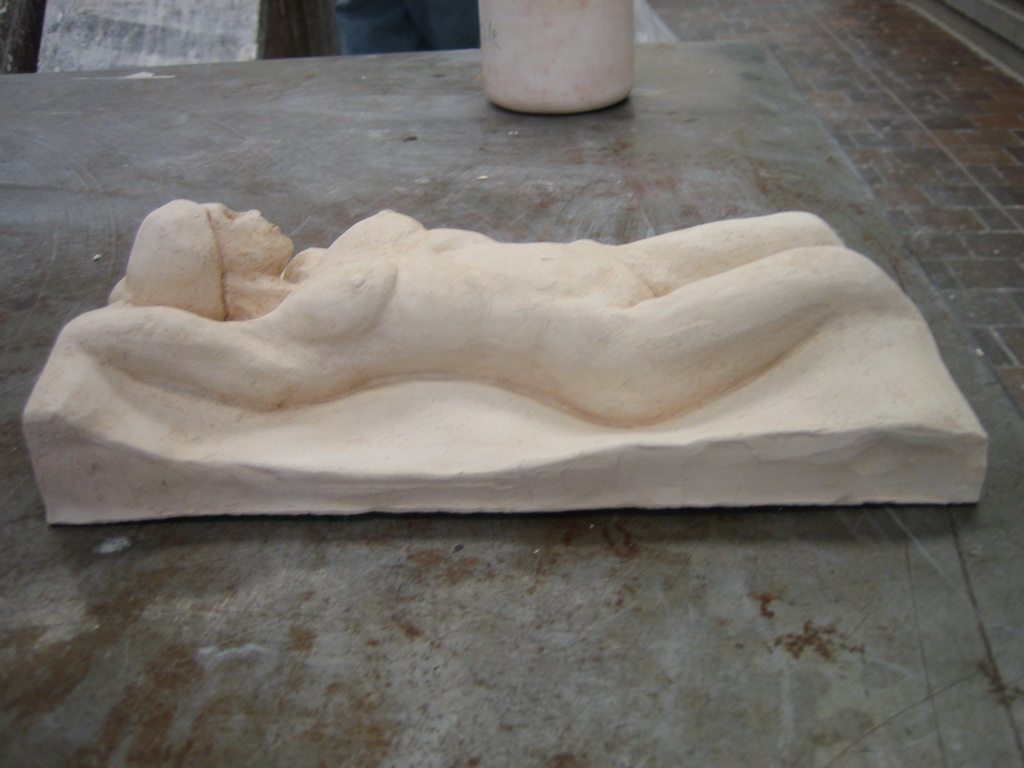
Anyway, the explanation is somewhat obvious, they are from one of my sculptures. But I didn't do a sculpture of too disembodied breasts. These where actually part of a much larger sculpture I did last year. It's one I have not yet posted. It's almost a life size female torso, which I molded and cast. When cleaning out the casting the breasts popped out of the mold undamaged. Everyone in the class thought they looked perfect, and that I should keep them. In fact a few people wanted to take them if I wasn't going to keep them.

Well I wasn't really interested in keeping them, but I also wasn't comfortable with others taking them. So I invoked my artistic right to be selfish and I keep them. I took them home in a black garbage bag on a board from the class, put them on top of the kitchen cabinets and forgot about them.

Looking at them now I am amazed how well they dried out. Normally this kind of clay cracks and flakes off as it dries. But they are almost perfect.

I'm still not sure what to do with them. They are too hard to work with, they can't be made workable again, and they are too dusty to use as is. The will probably go back in the bag and back on top of my new kitchen cabinets only to be found and wondered about in another 15 years.
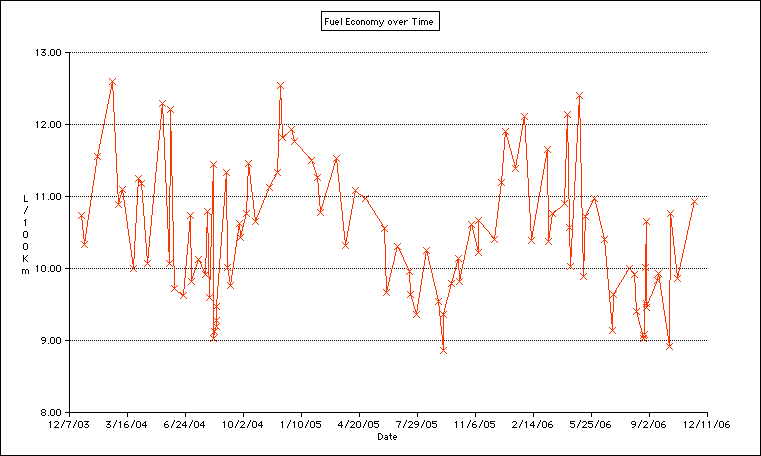
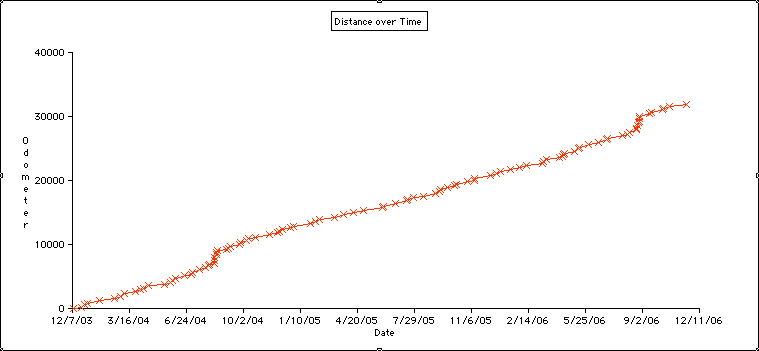
Wednesday, April 12, 2006

Condo: Elevator to Nowhere

Well I've been doing a lot on the Condo of the last few days. However tonight was not fun. I got stuck in the elevator for about 10 minutes. In fact I got stuck in two elevators.

The first one descended a few floors then stopped. The doors wouldn't open and it didn't feel like it was moving. Eventually doors opened on the next floor. Not wanting to temp fate I got off and called another elevator. I was far to high in the building to walk the rest of the way down. Besides I had my trolley with me.

A different elevator arrived and I rode it down maybe another 5 floors before it stopped. I waited a couple of minutes to see if it would open up on he next floor. It didn't. So I decided to press the Call button. Apparently this calls an Alarm Service company. I had a rather frustrating time talking to the lady on the phone. I couldn't understand her well and I don't think she could her me very well even though I was yelling.

I eventually got through to her what building and what elevator I was in. She said she had to put me on hold briefly. So I was on hold for about 2 minutes, then there was a click from the speaker. I now suspect this was the phone hanging up.

All the time I'm sitting in the elevator it doesn't feel like it's moving at all. However the number changes and the elevator beeps about once a minute. I was about to try the call button again when the number hit ground and the doors opened. This was very surpassing since it didn't feel like it was moving at all.

I got off and went to the concierge to tell him what happened. He was very surprised because he is supposed to be contacted immediately when there is an elevator call, and he had not been called.

He said this had happened over the weekend but technitions had been in to work on them. He said he would check on what was happening and notify people in the morning.

I decided I did not want to risk those elevators again so I went out the doors, and took the parking elevator down as far as it would take me and then walked down the ramps the rest of the way.

So I'm back at the old home and I'm glad I'm not planning on going over there Tomorrow. Give them time to sort things out. I'm still a little freaked out. I'm not good in small places when I don't have control over when I can get out.

Anyway, here is a picture of the pool. It's not finished, but it looks nice.

Saturday, April 08, 2006

Condo: Day Two

Well today went much better. The property management had arranged for temporary keys for parking so when I arrived this morning I was able to get to my space. It's not a bad space either, although it's very deep in the building, P4. But it exit into a the out lane and it should be easy to back into. I remember my friend Jeff's parking space was 1km into the basement. I'll have to measure mine, I bet it's close.

I do for see one problem. Leaf games. Leaving or arriving when a game is on could be very slow as I must pass through public parking before getting to resident parking.

Now to the condo, I'm feeling much better to day. I got up there and I got to do work on the place. My parents came down from London to help out. I realize now the fact that the builder hadn't been in to clean up was probably a good thing. I would have had to clean everything in the place anyway, it's best if it's just done by the person who cares about it.

So I assumed all the appliances. The fridge was the most fun, and it's enormous. You could stash a couple of people in there. Given the amount I use my current fridge, I suspect there will be a lot of open space.

I vacuumed then wiped down most of the kitchen cupboards. After a brief laps where I was cleaning the floor first, I quickly remember, it's best to start at the top. The amount of dust and saw dust on things was incredible. But you really didn't notice it until you wiped it off because it was so evenly distributed.

Next I got to plug in the stove. Lots of fun plugging in that giant plug. But those things scare me too, so I threw the breaker before doing it.

The appliances are all black, and they look really nice now that all the dirt is washed off them.

My Dad worked on cleaning the baseboards, the balcony and the windows. You can now see out the windows. There is still a fair bit of paint on them in places. Paint was splattered on everything. Fortunately it came of easily in most cases. My mom worked on the bathroom, and it looks great too. She also brought down some nice towels which match the bathroom quite well. They also had a bamboo moniker on them, which is funny because I'm thinking of getting bamboo hardwood floors in a year or two.

finally, to end the day we went to IKEA to look around and pickup my bed. I was disappointed to learn IKEA didn't to the free dinner with $150 or more purchase, but we had a good dinner there anyway. After doing the wonder through we picked up the bed in the warehouse. It's interesting how a simple queen sized bed comes as 6 separate boxes and bags, spread over two different aisle and 3 different bins. The bed side table was one box in one bin.

Where I was feeling dread last night, now I'm looking forward to getting back there tomorrow to do more.

Pictures: first is the living room through to the balcony, second is bedroom window, third is bathroom, as if that wasn't obvious, and the forth, as I've been lead to understand, is the kitchen.

Condo: The View Part 2


The previous shot of my view was a little more confined. This one gives a full 180 degree panorama. Unfortunately it was raining Friday when I took the picture, but it's still reasonably clear. I'll do another one in good weather, when we get some, which might be today.

Thank you to Calum for building the mosaic. My PC is down at the moment, haven't used it in like 3 months. The software he used, Autostitch, is currently only available for Windows.

Condo: Keys in Hand

I got the keys to my condo today. Left work early to go over and collect them and look over the place. Unfortunately, all did not go well.

All week I've had mixed feelings. I want to be really excited, and everyone else wants me to be really excited, but I know if I let myself get too excited I'll be disappointed. And that's what happened today.

The reasons, well some are not entirely unexpected, and the others are frustrations that will pass. I will be very happy with my place. It's just not in a state where I can feel that way yet.

The first problem was with the keys, or lack of a parking garage key. It's kind of hard to do anything at your residence when you don't have a place to park. I had planned on moving a bunch of stuff over there tonight, but that was quashed by having no place to park. Apparently they ran out of FOBs for the resident parking. There is no way to access my spot without them. While the did make an effort to allow me to park on the ground level until Monday when they will have more FOBs, I'm not comfortable with the ability of the parking attendants and security to grasp this concept, and not tow my car. By Monday this will pass, but it has thrown a wrench in my plans.

Second, almost no work was done on my unit from the time of the inspection a week and a half ago till now. The only exception is they installed the closet doors in the bedroom. Unfortunately they installed three, when the contract calls for two, and they installed mirrored doors when the contract calls for white.

While the mirrors are interesting, I'm not really excited by the idea of having an entire wall mirrored. That's why I had it written into the contract that they be white.

Finally the place is really dirty. The inspector said there would be a cleaning crew come through before I took possession. There is just as much or more dust on every surface as there was during the inspection.

So now I've got to give the place a thorough cleaning, and their off the hook for the work. I can't wait around for them the come in and do it. I need to move stuff in and get setup to live there.

I hope this doesn't sound too negative. It's not all bad. It's going to be a great place once everything is finished.

Pictures to come.

Friday, March 31, 2006

Condo: The View

I inspected my Condo on Wednesday. All went well. There were a few problems but that's to be expected. The closet doors in the bedroom were missing, the air vent above the stove wasn't fully boxed in and a few other minor things like scuffs on the wall.

The one thing that might be a bigger issue is a cable and a phone outlet were missing. I had ordered one for each section of wall. That way I wouldn't have to span a door ways to setup a TV anywhere I wanted. Unfortunately the cable outlet that's missing is right where I wanted to put my computers. The phone is less serious, mostly because I'm using the cell phone, but it's still a future consideration.

Fortunately there is a blank switch plate where the missing cable outlet should be. My hope is they just ran out of cable plates and put a blank one on temporarily.

I didn't get a chance to take many pictures, and most of the ones I did take are pretty dull, nothing but empty rooms. And of coarse I forgot to take a picture of the kitchen, the one room that looks like something. However I did get a shot of the view.

Tuesday, March 28, 2006

Sculpture: Tile, Bisque Fired

(March 2006)
Today was the start of the Spring Session of the sculpture class and I got the Tile Sculpture back. Much to my relief it did not explode the kiln. I'm quite pleased with how it turned out.

It's gone though the first stage of firing, called bisque firing. The next stage is called high firing. I'm assuming it called high firing because they take it to a higher temperature.

One thing you can do when high firing is add oxides to change the colour of the piece. A straight high firing will make this particular clay come out a gray stone colour. It also tends to pick up a reddish, orangish, brown tone from iron oxides in the clay and from surrounding pieces. However this effect tends to only happen to the most open areas of the sculpture.

So to even out this effect I added an oxide called rutile. Don't know exactly what it is, but it will give the piece a light reddish, orangish, brown tone. Or at least that's the plan. You never know what's really going to happen in a kiln.

The pictures show the raw bisque fired piece, in white, and with the rutile applied. The final picture is of the piece in the kiln. This is the smaller high fire kiln. It's big enough to sit in when it's empty. The bisque fire kiln is in the same room. That one is large enough you can walk into it.