(May 2002)
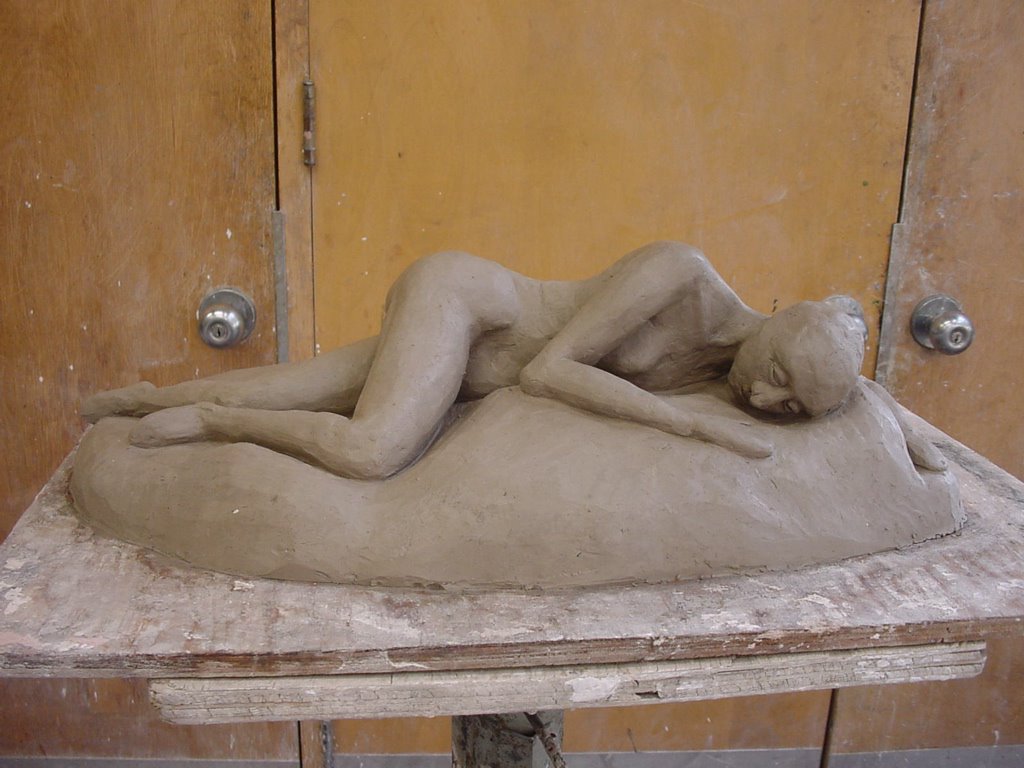
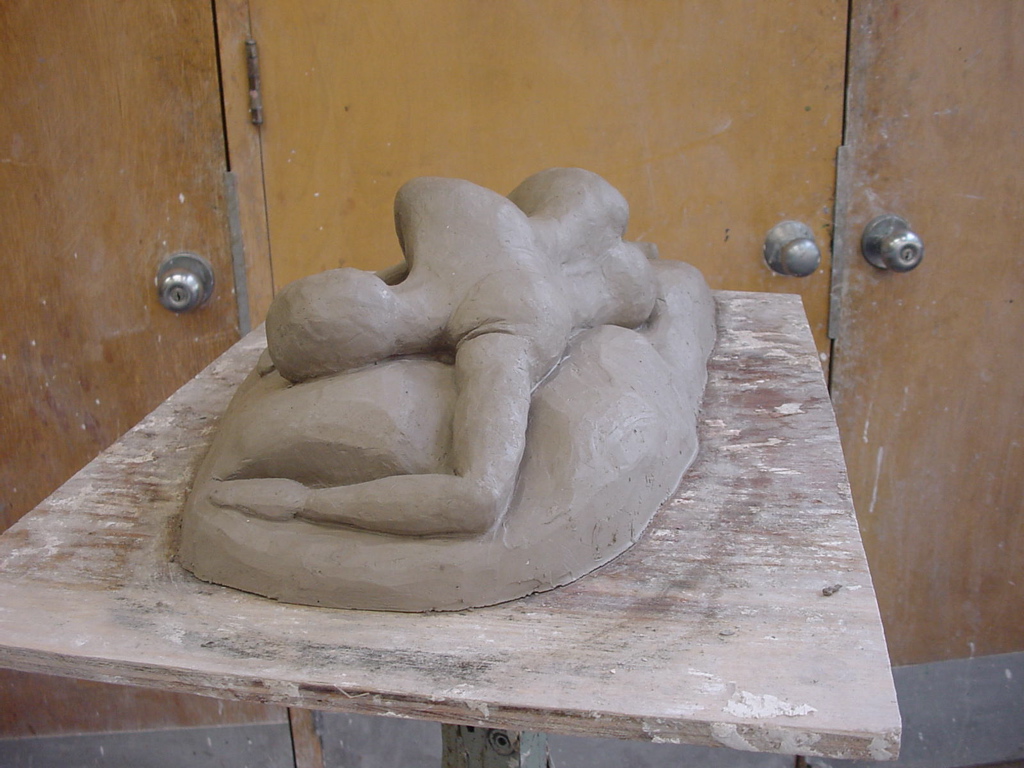
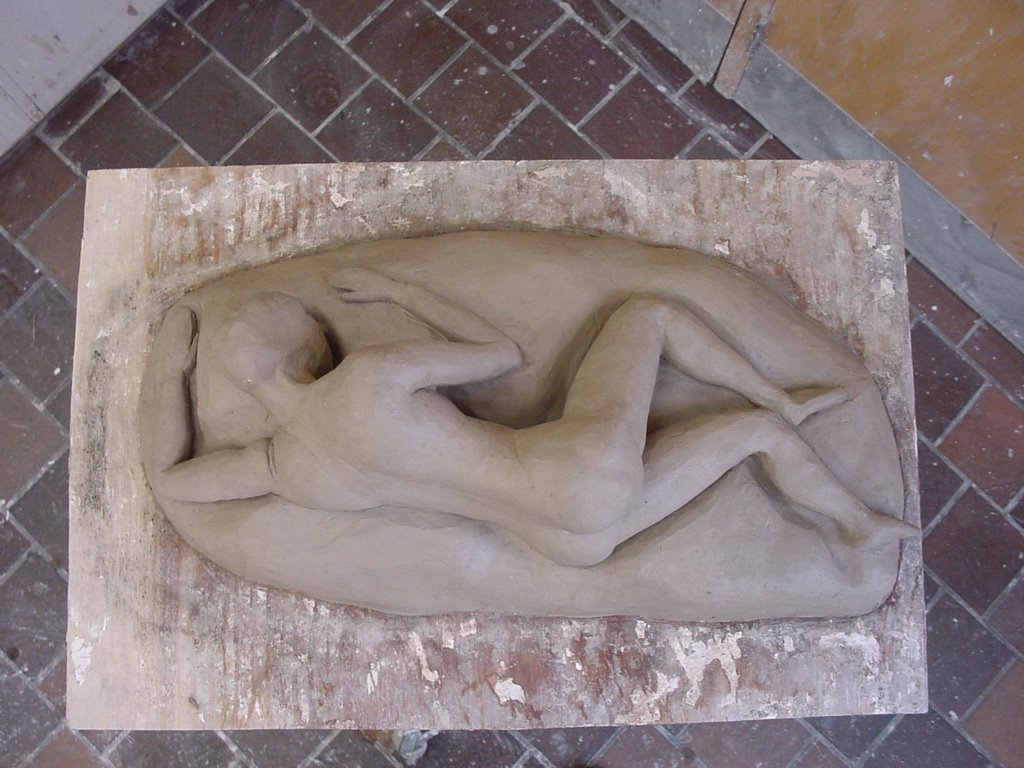
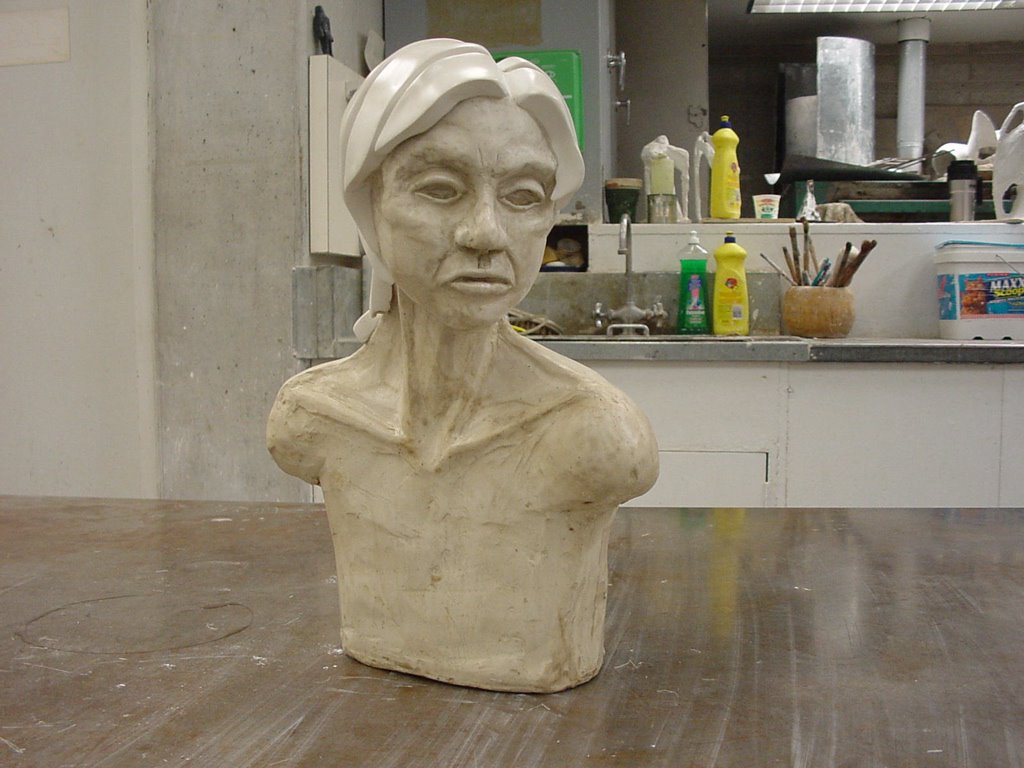
As I said earlier this was the first sculpture I took through the casting process to make a finished and perminent piece. This pictures are of the final result. Getting here was a long and involved process. One day I would like to document it photographicly, but it's so messy it's impossible for me to do on my own. There is a recent sculpture that I managed to get some intermidieate stage photos from, so I'll post those as I get to that sculpture.
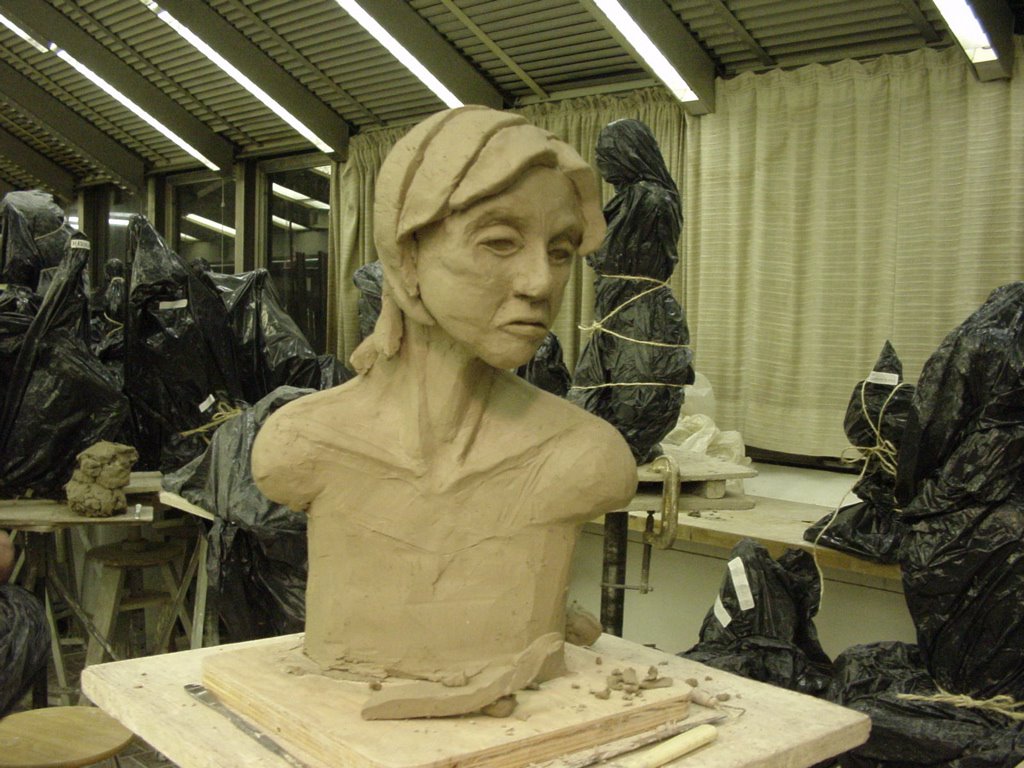
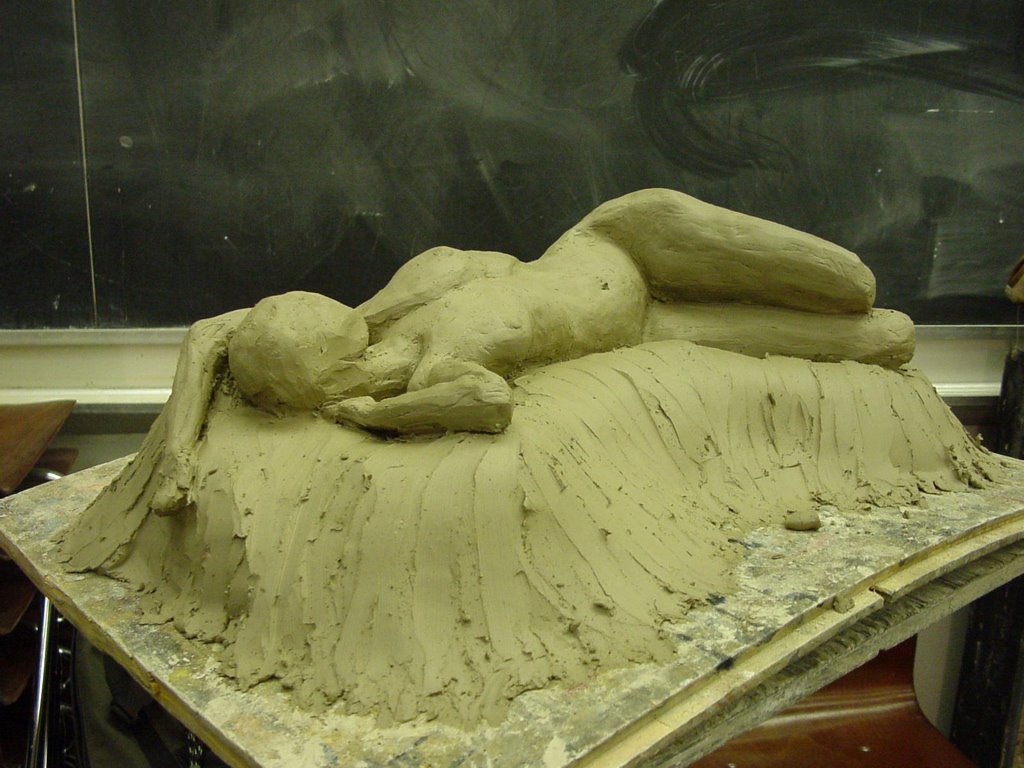
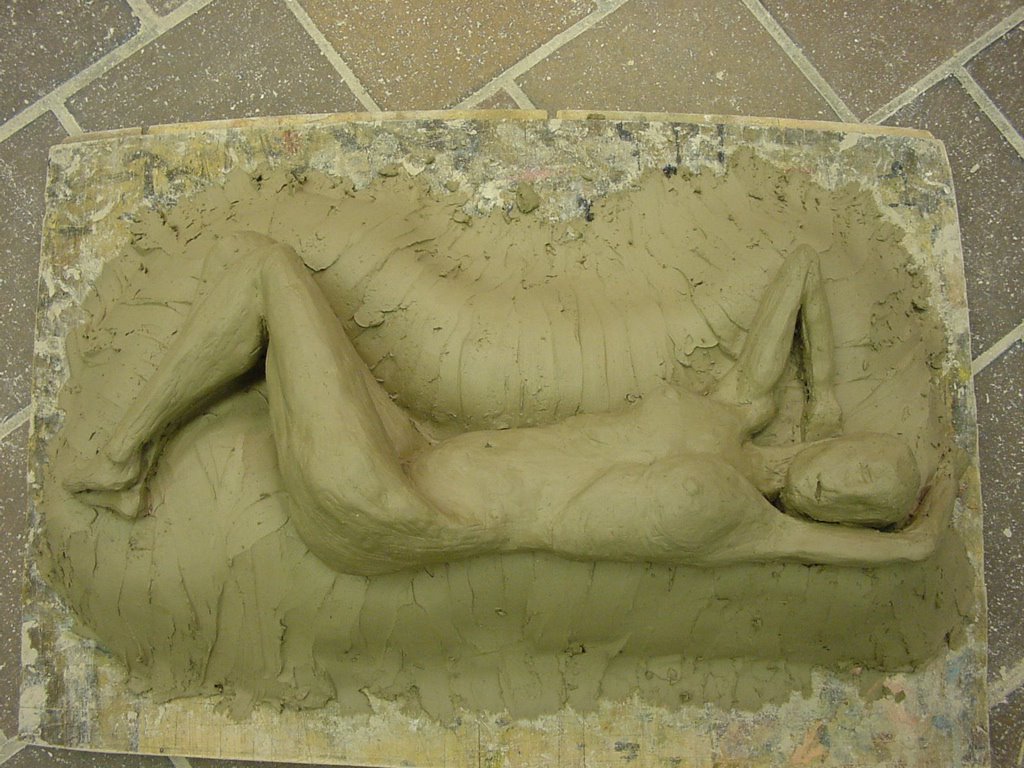
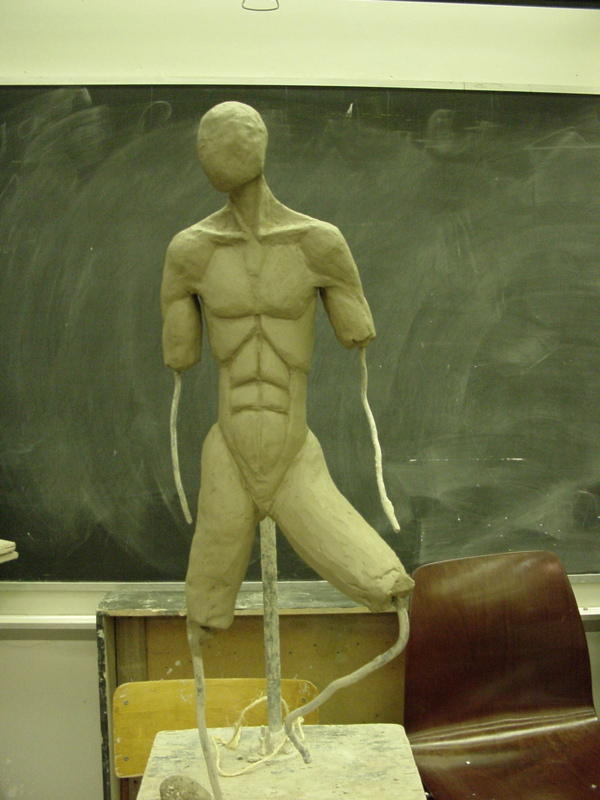
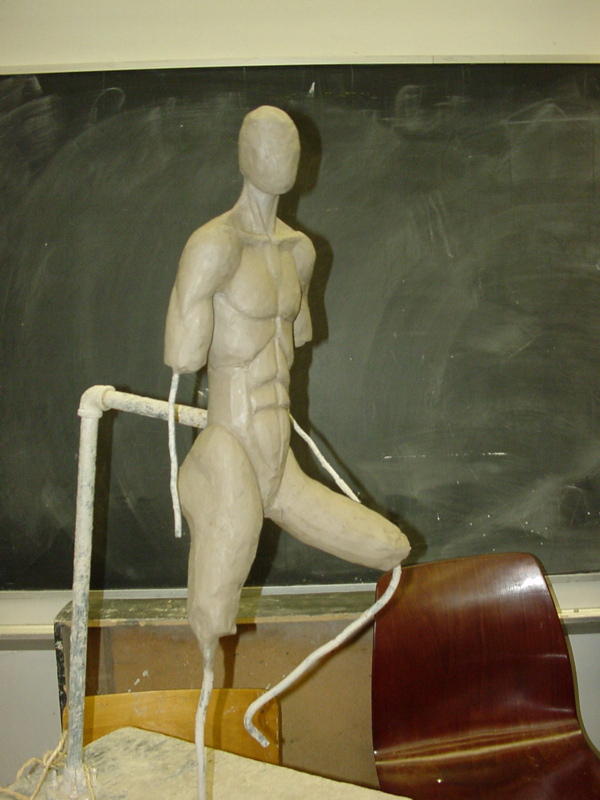
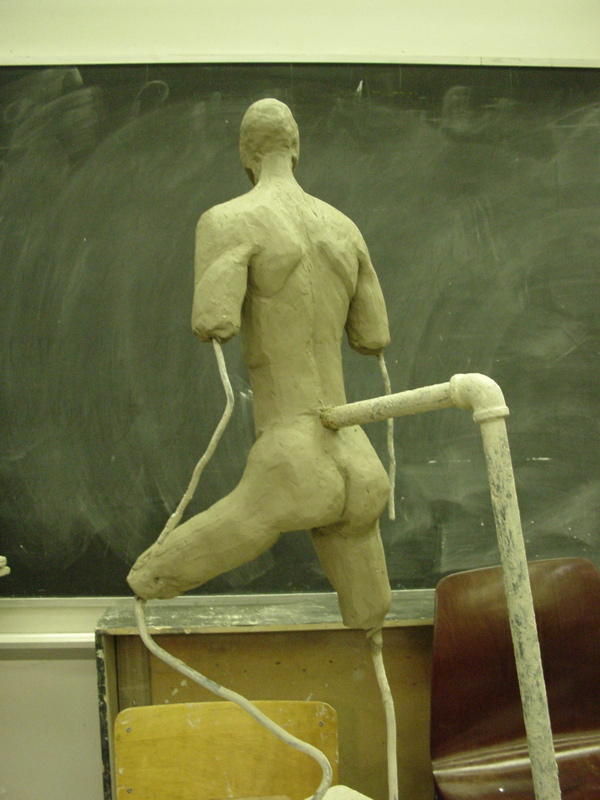
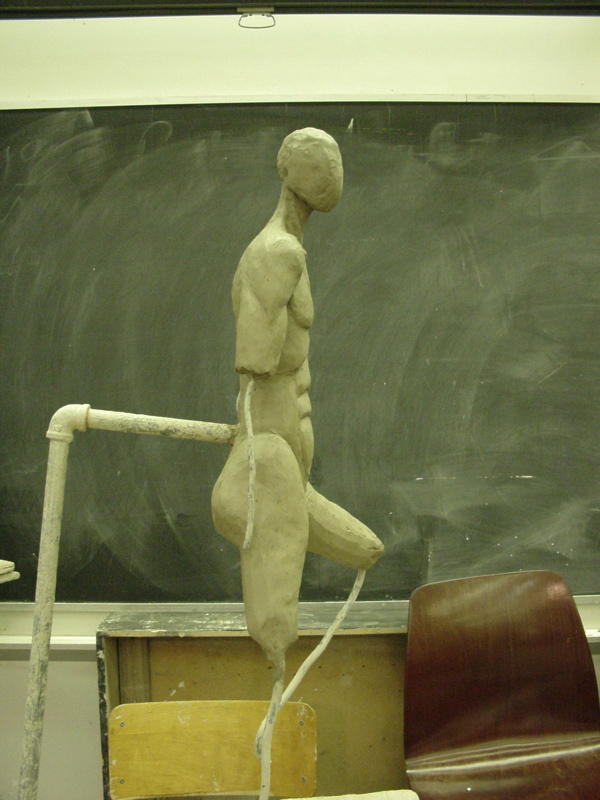
The previous post was of the sculpture as it appeared in November of 2001. This was from the last day of the fall class, and therefore the last day I had with the model. After taking the pictures I packed it up on garbage bags to keep the clay wet and stored it for the winter. The school is very good about letting us do this. The only time we can't store a peice we are working on is over the summer. Two months off, good time for a purge.
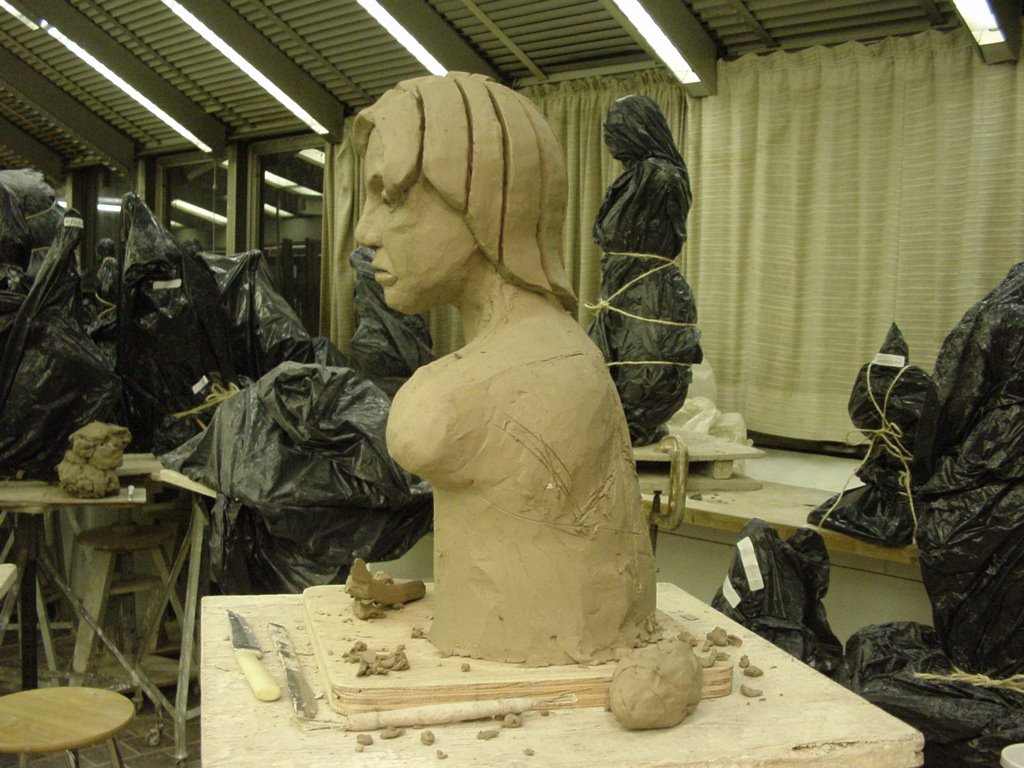
When the winter term started I started work on cleaning up this piece. If you look closesly at the previous picture you will notice a lot of scratch marks and cracks in the clay. Particulary in the hair. The hair I added in the last hour of the last class. It was a rush job. Although not realistic it does capture the look of the models hair style. I've come to like this soft yet chunky looking style of hair. It shows up a lot in future peices.
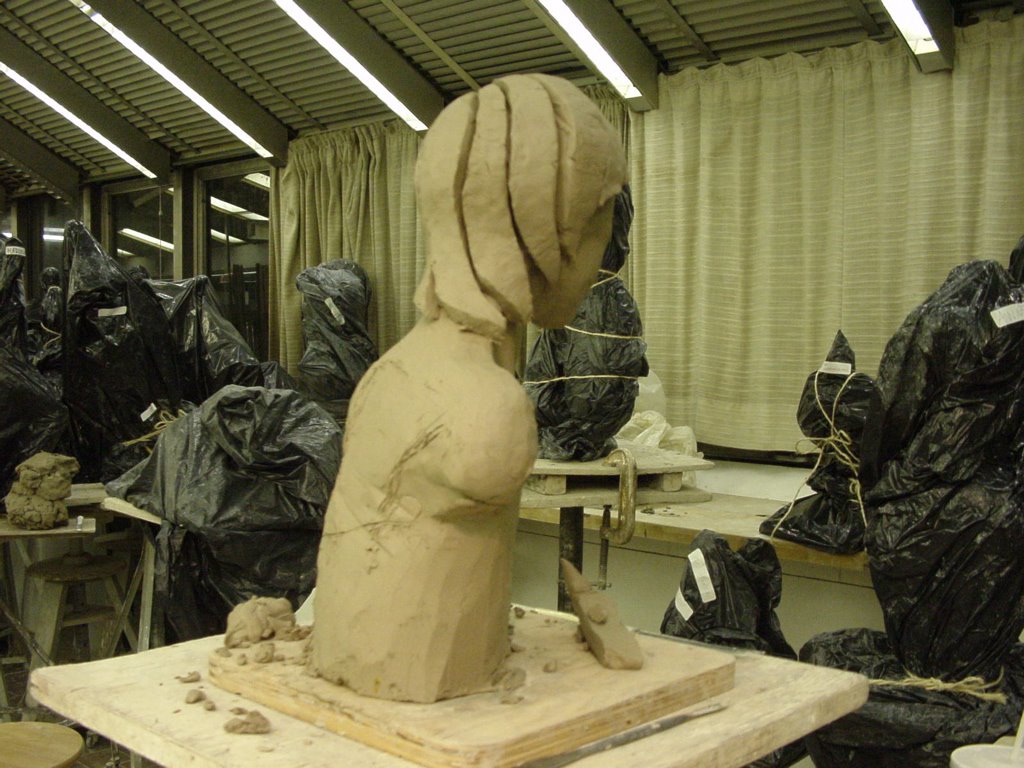
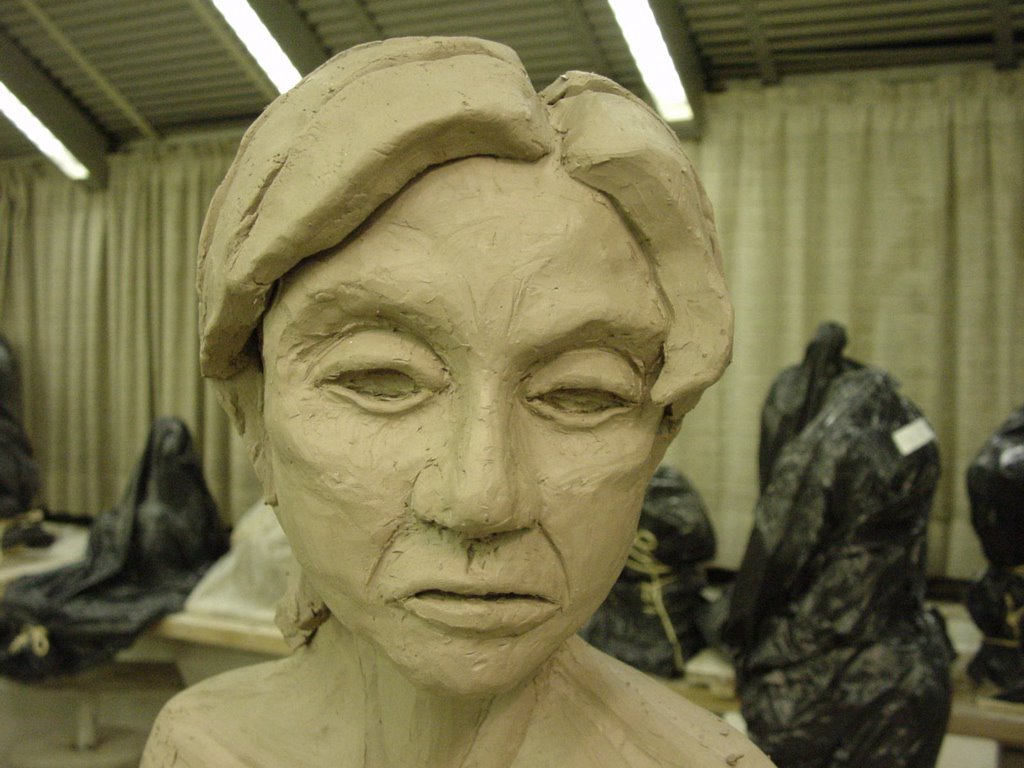
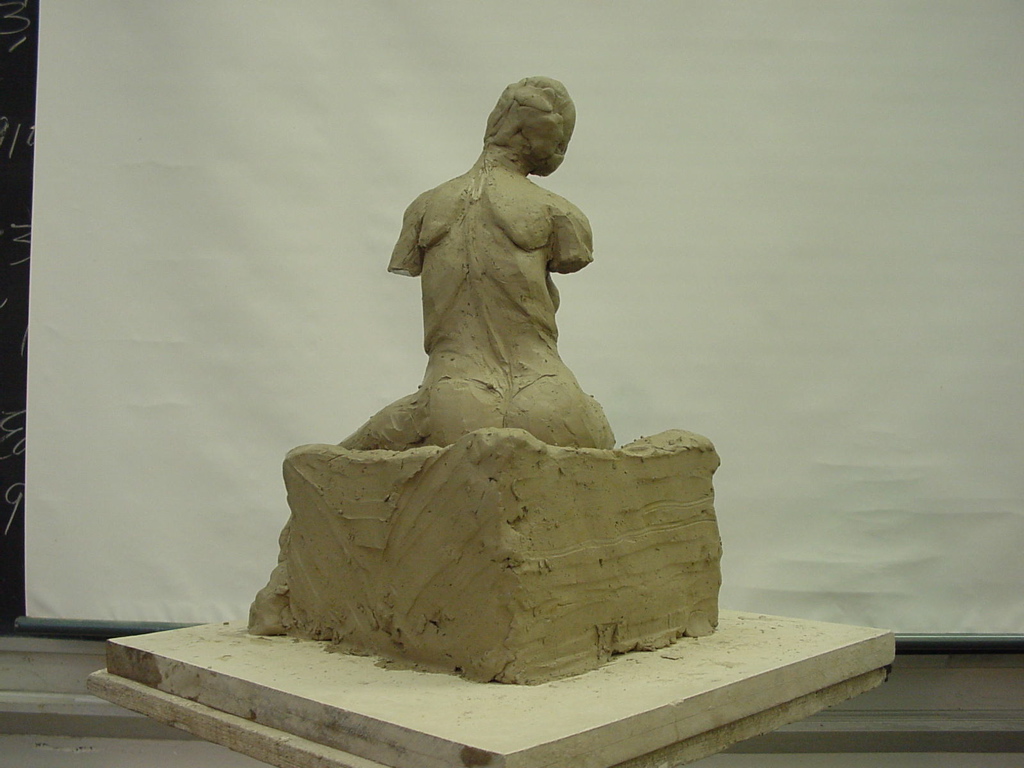
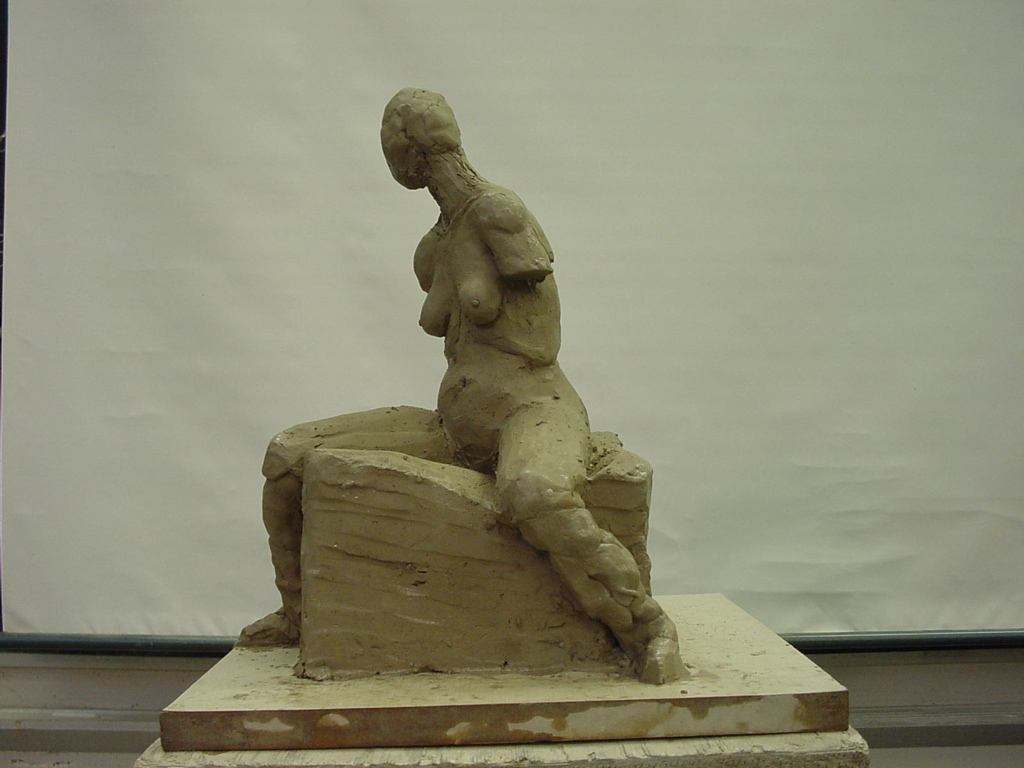
So I spent the first class cleanup all he marks and finishing up the hair. I had decided I wanted to do it very smooth so I spent a lot of time smoothing it out. I also cleaned up the markings on the back of the piece and touched up the face.
The one thing I didn't do, which would have made it a more complete peice, is address the body. I wasn't really interested in doing the body when the model was posing, and I didn't really have time for it either. What's there is really just there because it was needed to hold up the head. I thought about cutting it off, but I didn't want it to end up looking like a head on a pike. Untimately the process of casting it was driving me more then the desire to complete the look of the piece and the body remained unchanged from when I modeled it. This is somewhat unfortunate because it does tend to confuse people, particulary about she gender.
The casting process, as I've said a few times now is long, messy and a little tedious. Long and tedious I am very good at, messy I have a little trouble with.
The first step is to plan out the number of piece the mold needs to be. This is deturmined by the complexity of the piece, and the need to get the clay out of the finished mold. This piece required a two peice mold. Not recomened for a first casting, but the teacher and the technologist had seen me work for more then a year and knew it wouldn't be a problem for me.
To make a two peice mold you need to divided the sculpture in two. Preferably in equal halves. To do this you create a clay wall. The wall is made of strips of clay about one and half inches wide and half an inch thick. This wall is lightly attached to the sculpture. For this sculpture I built the wall up either side of the body, and over the sholders. It then turned slightly to follow up the sides of the neck, following the twist in the neck. Once it reached the hair I followned along the part between two sections of hair on each side. The wall then followed the hair up each side of the head until it met in the true part of her hair.
Finaly registration marks were made in the wall by taking a quarter and holowing out little dishes in the wall at regular intervals. When the model is complete, one peice with have dishs and the other will have matching bumps where the two halves come together. This makes sure it aligns properly when you bring the two halves together.
Now we come to the first stage of actaully making the mold. This stage is called the splash coat, and that is a very literal name. This is the messiest step of all, and with a two piece mold you need to do it four times.
The mold is made from plaster. Your basic plaster of paris. It cures resonably hard, but not so hard that you can't brake it away. The splash coat is done by mixing up some plaster and literaly spashing it on the sculpture when plaster mix is fresh and at it runniest. This isn't entirely a hap-hazard approch. You are looking to get full coverage of the first half of the sculpture. You are also trying to avoid creating bubbles. To ensure this doesn't happen you often need to blow the plaster into the cracks and crevases of the sculpture. This requirement became very clear when started applying plaster to the hair. The deep grooves I had created where quite difficult to fill evenly with plaster and avoid all bubbles. One bubble in this area would cause the whole groove to disappear. Because I was making a negative mold, these grooves become very thin walls in the negative mold. One bubble and the wall would fall appart easily.
After the first splash coat is finished you do a second splash coat. This ensures full coverage and also provides a layering effect in the plaster which adds strength to the image side of the mold.
Once the splash coats where finished the next batch of plaster is allowed to setup a little before applying. Basicaly you let it become the consistancy of butter. Using this thick plaster mix you fill in all the negative spaces in the mold, trying not to apply too much, but also smoothing out any sharp edges in the previous layers of plaster. For example the space under the chin had to be filled in and smooth out. Sharp changes in direction in the plaster mold create weak spots which could crack or break when the mold is opened to remove the clay.
Once mold is completed on one side of the sculpture, you get to do it all over again on the other side. Before starting the clay wall that was built for the first side is removed. This is where you see the dishes that were made into the clay wall appear a bumps in the plaster of the first half of the mold.
So the two halves of the mold don't stick together you put what is called a slip on the first half of the moded where the two peices will come together. In this case the slip is simply clay mixed with water untill it's quite runny and then it's painted on the plaster. Works remarkably well.
So at this point repeat pretty much everything I've said so far for the second half of the mold. If you find this explanation long and teedious, it's not nearly as bad as actaully doing the work. Cheer up we are about a quarter of the way through.
Once both half of the mold are complete, they need to be strengthend. To do this burlap is soaked in plaster and layered onto both halves of the mold. This is much like making a plaster cast on someones arm. Not that I've ever done that.
Through the whole process of building the mold you need to remember that it's eventualy got to come off the final peice. The more plaster you put on the more you have to take off. It's a delicate balance of trying to use just enough for the strenght you need without over doing it. You don't want to making the mold too heavy and difficult to remove or too weak that it doesn't survive long enought to complete the casting.
Wow this is taking a long time to explain, I hope you people now understand why I don't cast very many pieces.
At this point the mold is complete, but the clay is still inside. It took me two classes to get to this stage, it will take another class just to get the clay out.
This is where the original clay sculpture gets distroyed. To open up the mold the mold is placed in a bath of water an allowed to soak for a while. Then water is poored over the joint between the two halves of the mold and the halves are gradualy pried apart. There is usualy a "shluck" kind of sound when if finaly comes appart.
Now the two halves are separated but each half has a good chunk of clay in it. This stage has tought me that smooth sculptures are much easier to clean out of the mold then rough ones. Basical I spent the entire class gradualy picking the clay out of the mold. Sometimes it comes free in big chunks, sometimes you got pick out tiny piece after tiny piece. It's a no win situation too. If the clay is too wet it gets slimy and is hard to remove, if it's too dry it sticks in too well and can break delicate parts of the mold when removed.
Three classes and I have a clean mold. I'm thinking most of you probibly stopped at the pictures. "He he, look at the funny white hair, it so shinny and smooth"
Can I cast it now? Maybe I should have done a series of posts on the casting process. Yes but then I'd have to drag it out even more. And I'd get more critasism for not having pictures of the process. I hope you can see how having your hands constantly covered in plaster and clay is not condusive to operating a camera.
But the answer is no, I can't cast it yet. Because I chose to cast it in Densite, a gypsum cement, which is much like plaster, but cures much harder I needed to add a mold release. Similar materials like to stick together. Without a release to separate the two types of plaster you end up with a solid blob.
When building the mold I used a clay slip to separate the two halves of the mold. Although this would work it's not ideal. The clay will mix in with the very white densite and create a muddy surface on the final piece. So instead Sunlight dish deturgent is used. The school has used this for years. It's cheap and very effective, and washes off easily when the mold is opened. To prepare the mold three coats of Sunlight are used. First the mold is soaked in water so it's saturated with water. Then the first layer of Sunlight is added by rubbing it in with a brush. The brush is used very vergerously so the soap foams up. Once finished covering the entire inside of the mold you let it sit till all the soap is absorbed into the mold. Then you add two more coats by rubbing the Sunlight in with your fingers. Again waiting for it to be absorbed between layers.
The best time to cast the mold is just after the final layer of sunlight has absobed into the mold. The mold is closed and strapped together. Then a plaster soaked strip of burlap is wrapped around the mold to seal up the joint between each half of the mold. A big lump of clay is also kept handy to plug any leaks that might happen.
The Densite is mixed up the same way plaster is. In this case a very big batch was made to fill the entire mold. Although I didn't do this in this case, it often a good idea to do a skin coat before filling the entire mold. This is done by poring a small amount of Densite into the mold when it's reasonably thick and sloshing it around until it creates a thin skin on all the inner surfaces. You must be careful not to create any bubbles. This often creates a better finish because it ensures all the finer details are filled. However it can be a mixed blessing because if too much soap mixes in with the Densite as you are sloshing it around the skin layer won't bond to the rest of the Densite and chip off.
The rest of the Densite is poured into the mold. While the Densite is still liquidy you slosh the mold around in an effort to release all the bubbles. Tapping the side of the mold helps too. Densite cures a little more slowly then plaster, so usualy it's left over night.
If you are lucky you can soap and pour the mold in one class. The soaping take verying lenghts of time depending on the temperature and moisture content of the air in the class room. Sometimes it just doesn't want to soak in and takes forever, sometimes it takes 15 minutes a coat and you're ready to go in less then an hour.
So I believe at this point I was at the 4 three hour class mark in the casting process. At this point I basicaly have a large heavy blob of two types of plaster. Now I need to separate them. The type of mold I made for this is a waste mold. That's because it is lost, or wasted when you remove it. So now it's time get out the hammer an chisel and waste the mold.
At first this is great because you can wack away at the outer edges of the mold and knock of large chunks of plaster. As you get closer to the actaul peice you need to be a lot more carful. This is another time when a smooth sculpture makes a big difference. Large pieces of plaster often just fall away from the sculpture if it's smooth. When it's rough you could be picking the plaster way for weeks.
Am I almost done yet.
Once all the plaster if off it's time to start thinking finishing. For this piece I did something unusual. Usualy people just finish them in one colour. There are tons of example sculptures around the class and they are all have a single colour washed on them.
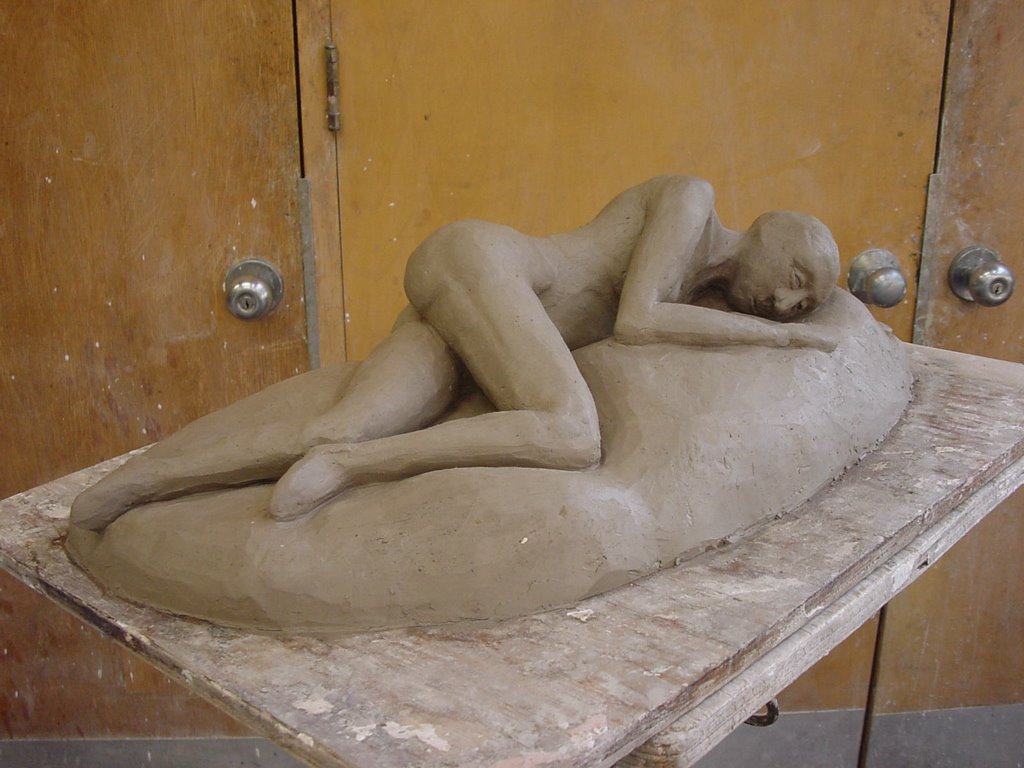
The raw Densite is very white in colour, equivelent to the colour of the hair. I really liked who stricking this made the hair and wanted to keep it that colour. The face and body I wanted to give more of a skin tone too.
To finish the hair first I sanded it. Then I sanded it again. Finaly I sanded it some more. Using progressively finer grits of sand paper I polished the hair very smooth. To preserve the natural white of the densite I then rubbed in some clear floor polish. This will prevent dirt and dust in the air from getting into the pores of Densite and dulling the brightness of the white.
On the body I mixed linsead oil and different coloured pigments to get the tone I wanted. I then brushed this on lightly in several layers. This allowed the oil to soak into the Densite. Densite is porous, but the degree of porousness is effected by a lot of things. Because our casting environment is far from controled the veryation in porocity in the Densite creates wonderful patterns in the final casting. Layering on the linsead oil highlights these patterns.
 (May 2002)
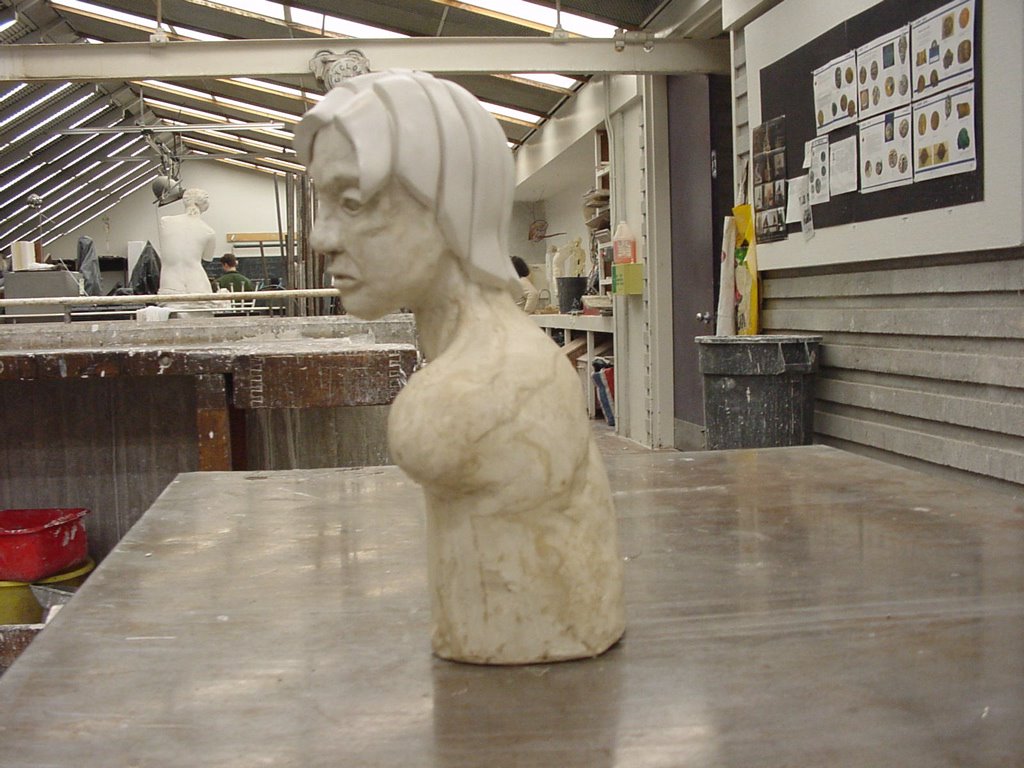 This sculpture was cast in a material called Densite. Densite is very much like plaster, it just cures harder and stronger. The mold is prepared for casting by coating the inside with Sunlight dish detergent. A cheap and effective mold release. Because Densite and plaster are similar materials they like to stick together. The mold release keeps them apart. The Densite is mixed up and poured into the mold. You have to wobble the mold around and tap on the sides to release any bubbles that may have formed while pouring the Densite. Then you let the mold sit while the Densite cures.
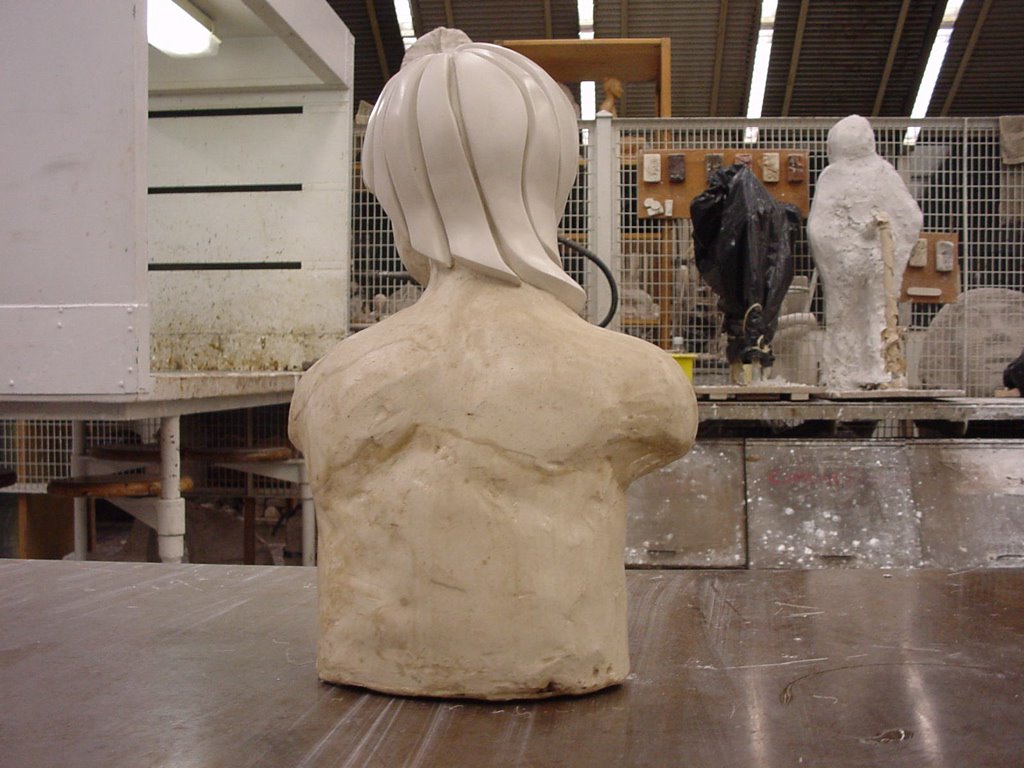 Once released any finishing work can be performed on the sculpture. Densite is very white in it's natural form, but it also takes pigments well. When I looked at the piece I decided I wanted keep the hair the natural white colour. I also wanted to make it very smooth. To do this I sanded it. Then I sanded it some more. Then did some more sanding. And finally sanded it. This was done with progressively finer sand papers. I think I started with 100 grit dry paper and ended with 400 grit wet sanding. Finally a clear floor wax was used to seal the surface so it wouldn't pickup dirt.
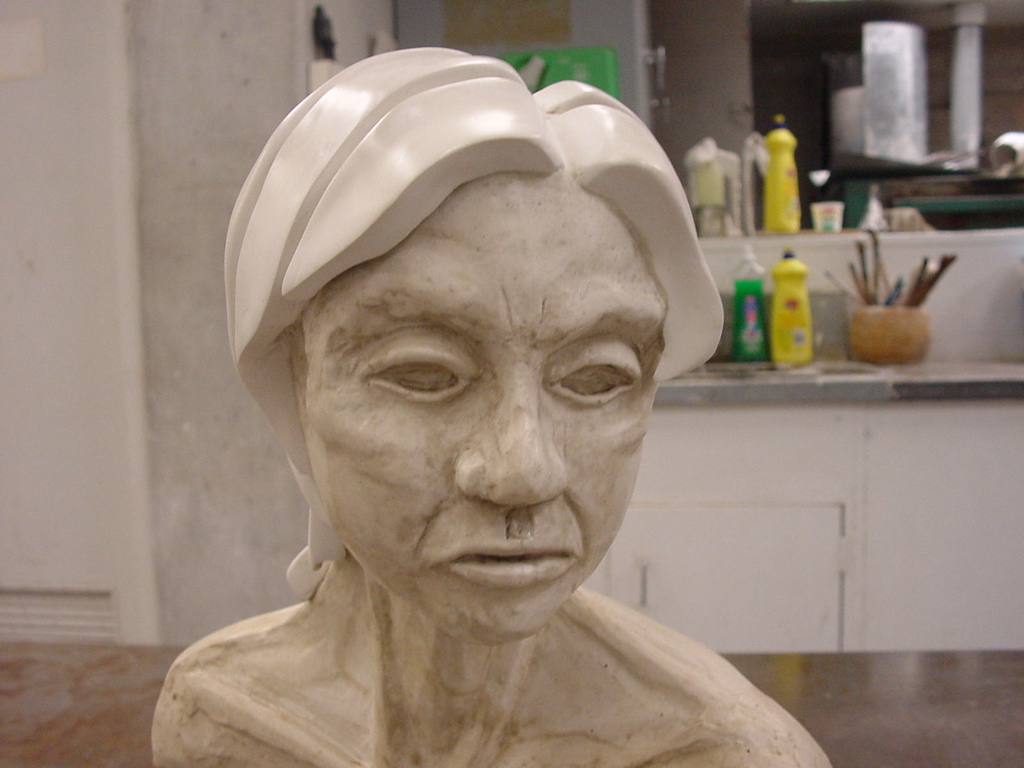 The face and body I wanted to tint a kind of skin tone. To do this I mixed several different pigments together with linseed oil and paint thinner. The linseed oil helps to seal the Densite, and the paint thinner makes it, well thinner, so it's absorbed better. By making the pigment very light many layers needed to be applied to get the colouring. This has the effect of bringing out the natural flow lines in the Densite.